Minecraft Setup
Modpacks
How to install Fabric modpack
Make your server Fabric
Before installing your modpack there are a few things we need to do before hand to set it up.
You may also use the modpack installer on our game panel.
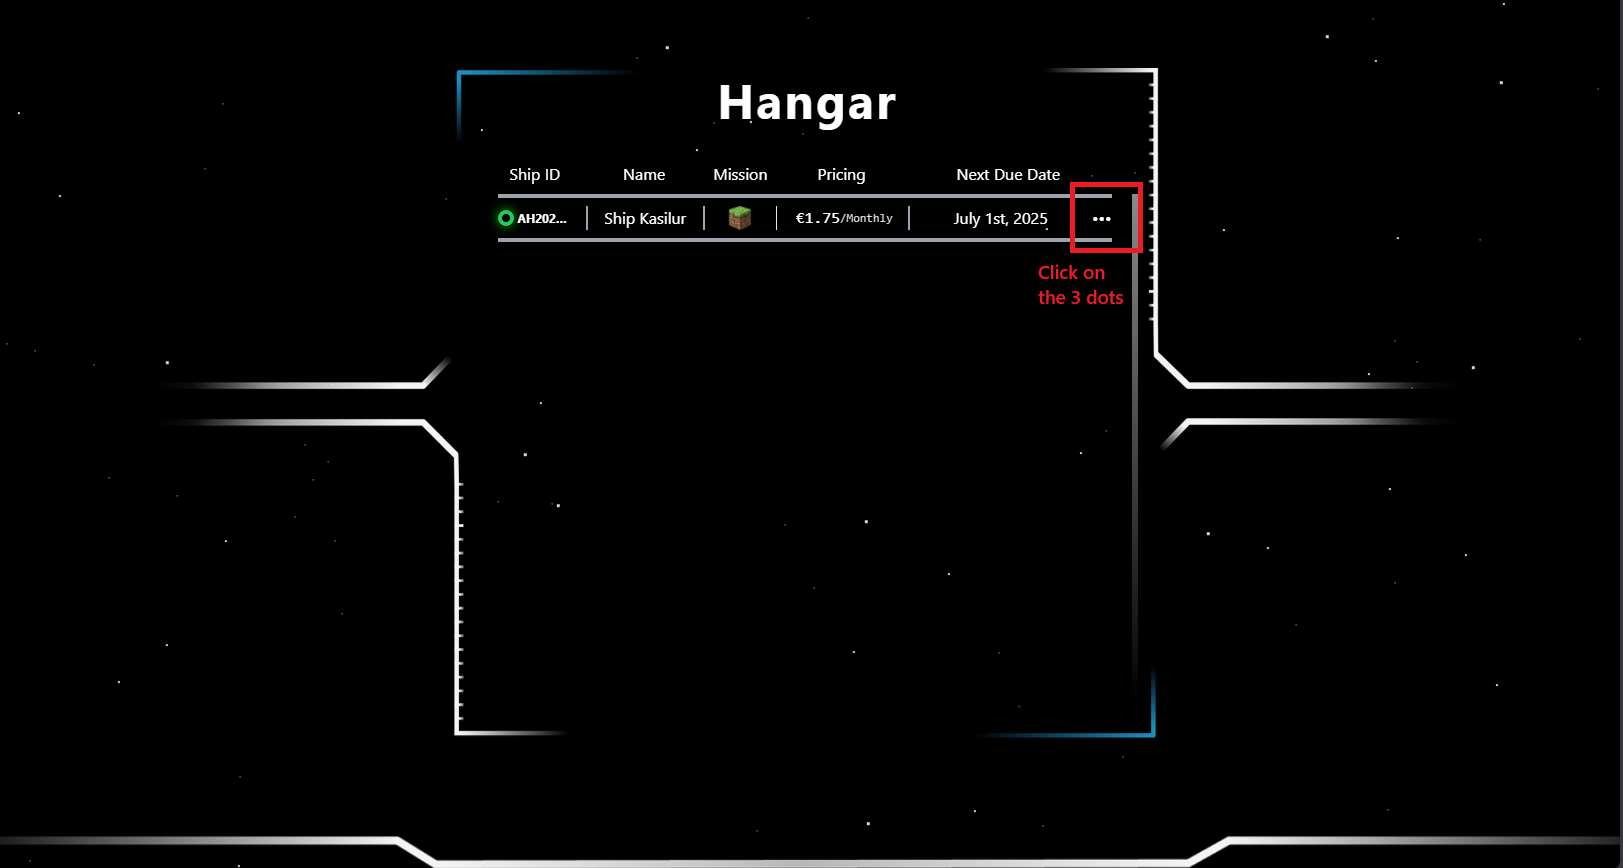
Step 1: Make sure to head over to your billing dashboard and head to the server which you want to change to Fabric.
Click the 3 dots.

Click on Manage Fleet.
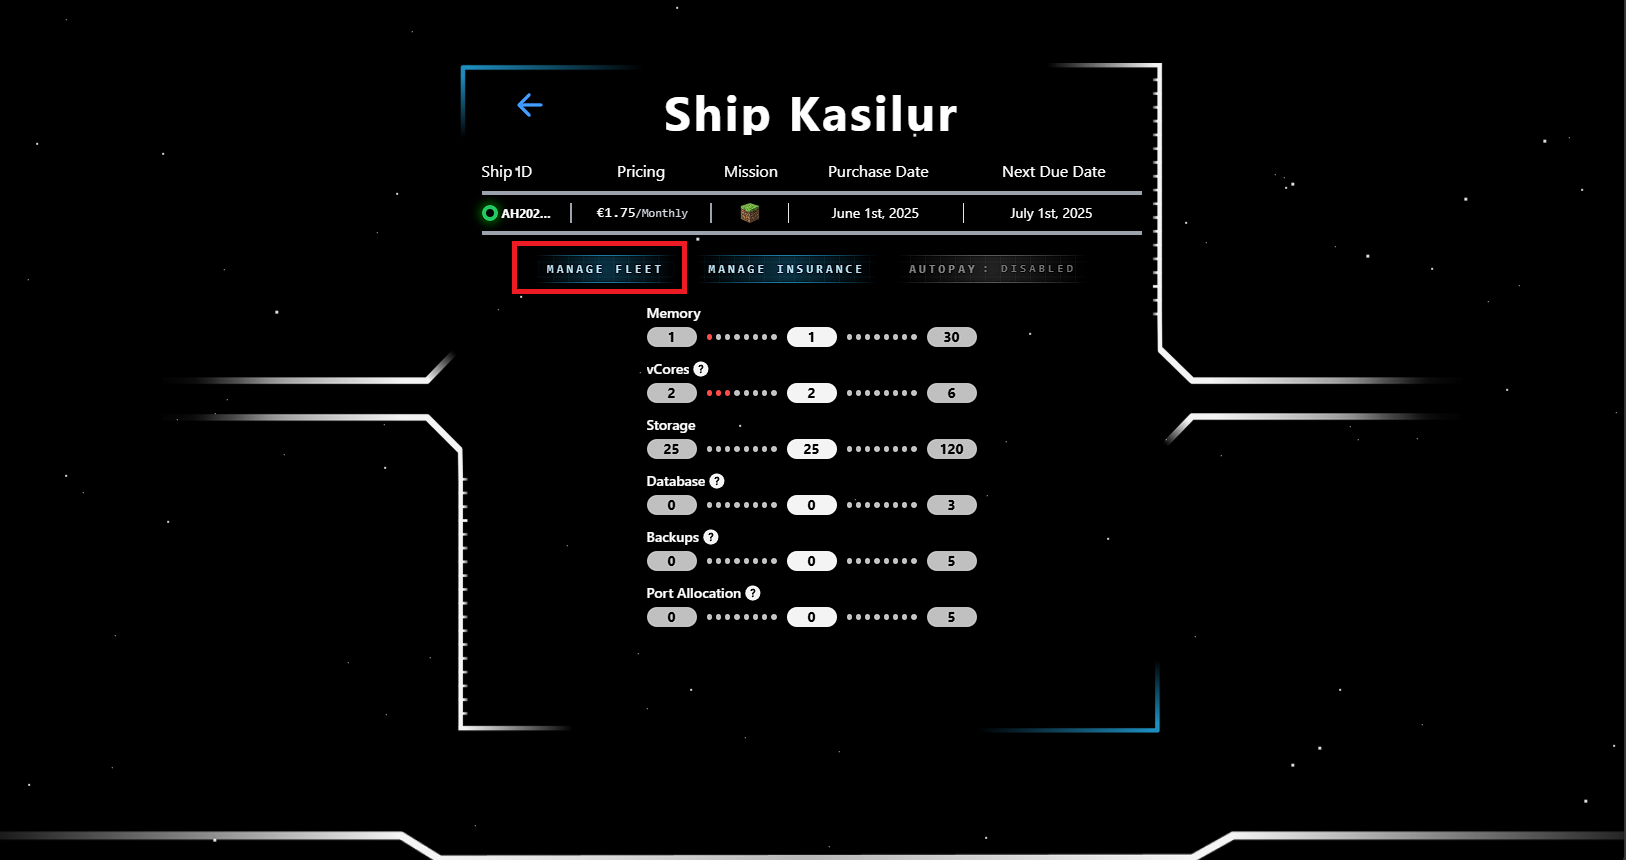
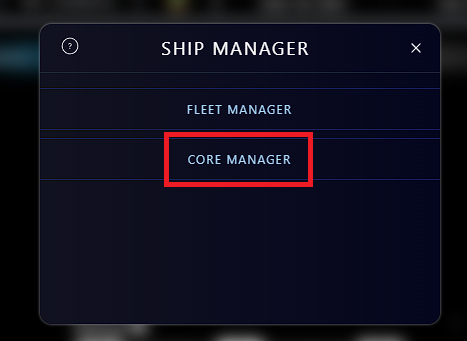
Here select Core Manager.
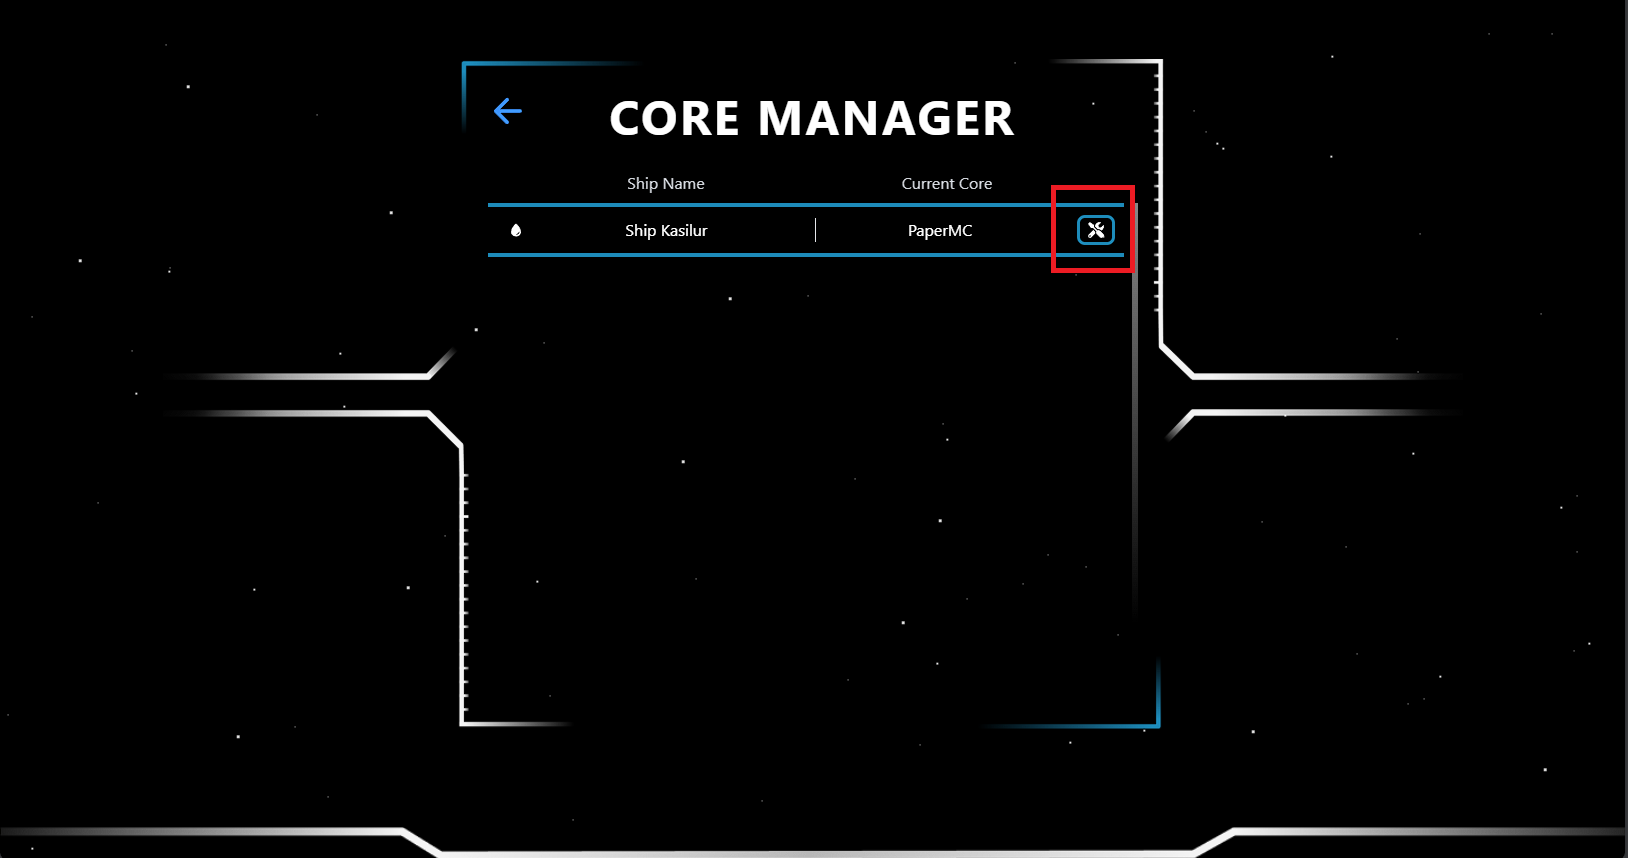
On this page, press the tools icon, as shown in the image below.
Click on the dropdown menu, and select Fabric

Now toggle "I am sure about this", and click Set Ship Core, to apply the changes.
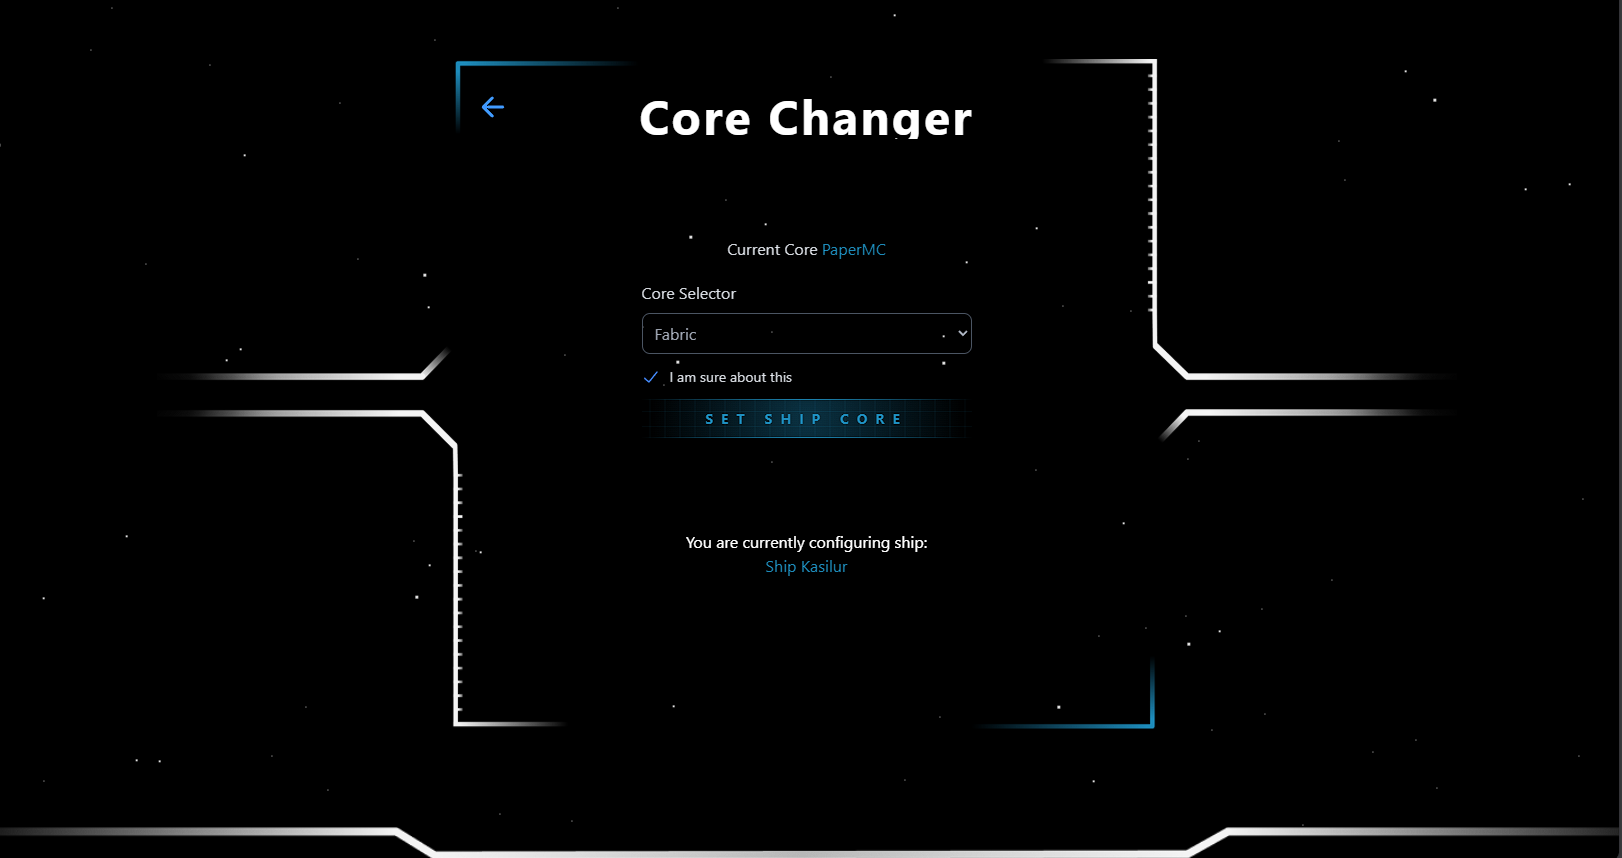
And now you have a Fabric compatible server. (May need to reinstall from the "Settings" area, on the game panel).
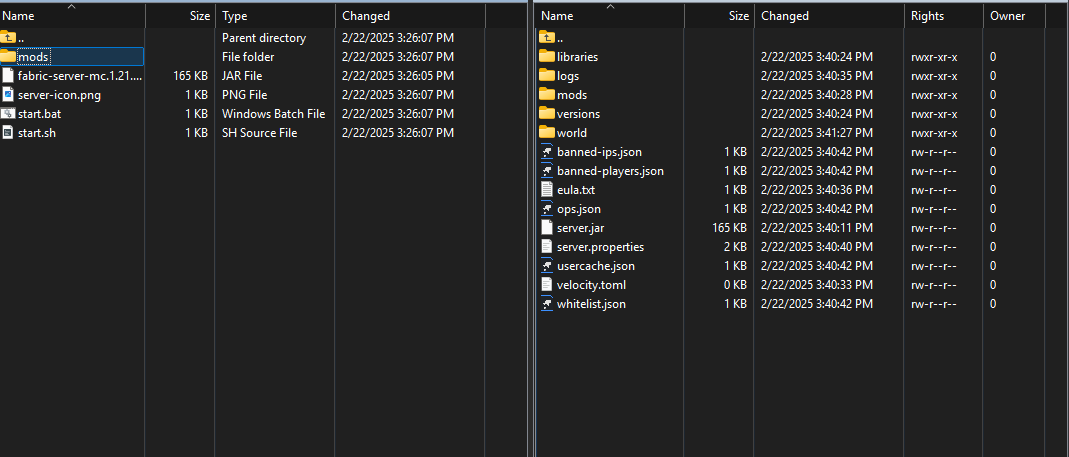
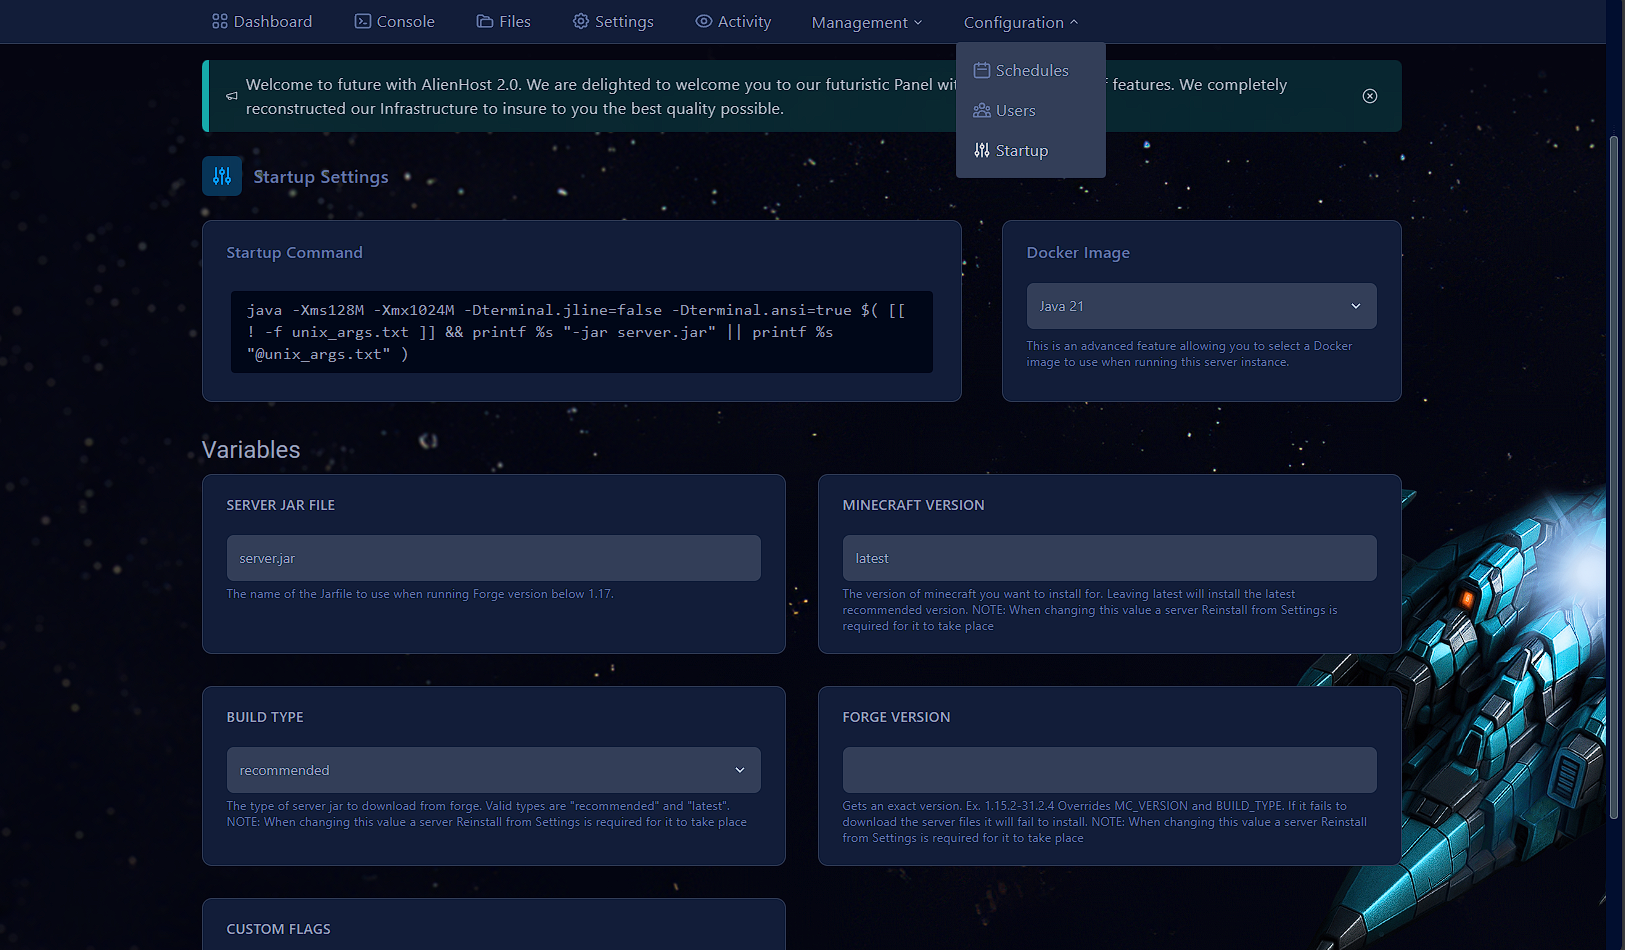
Step 2: After Completing Step 1, we now head over to our panel to configurate our server. To check that your server is Fabric, head over to the Startup Area (accessible from the dropdown menu, under the Configuration tab, on the panel). Check the image below.
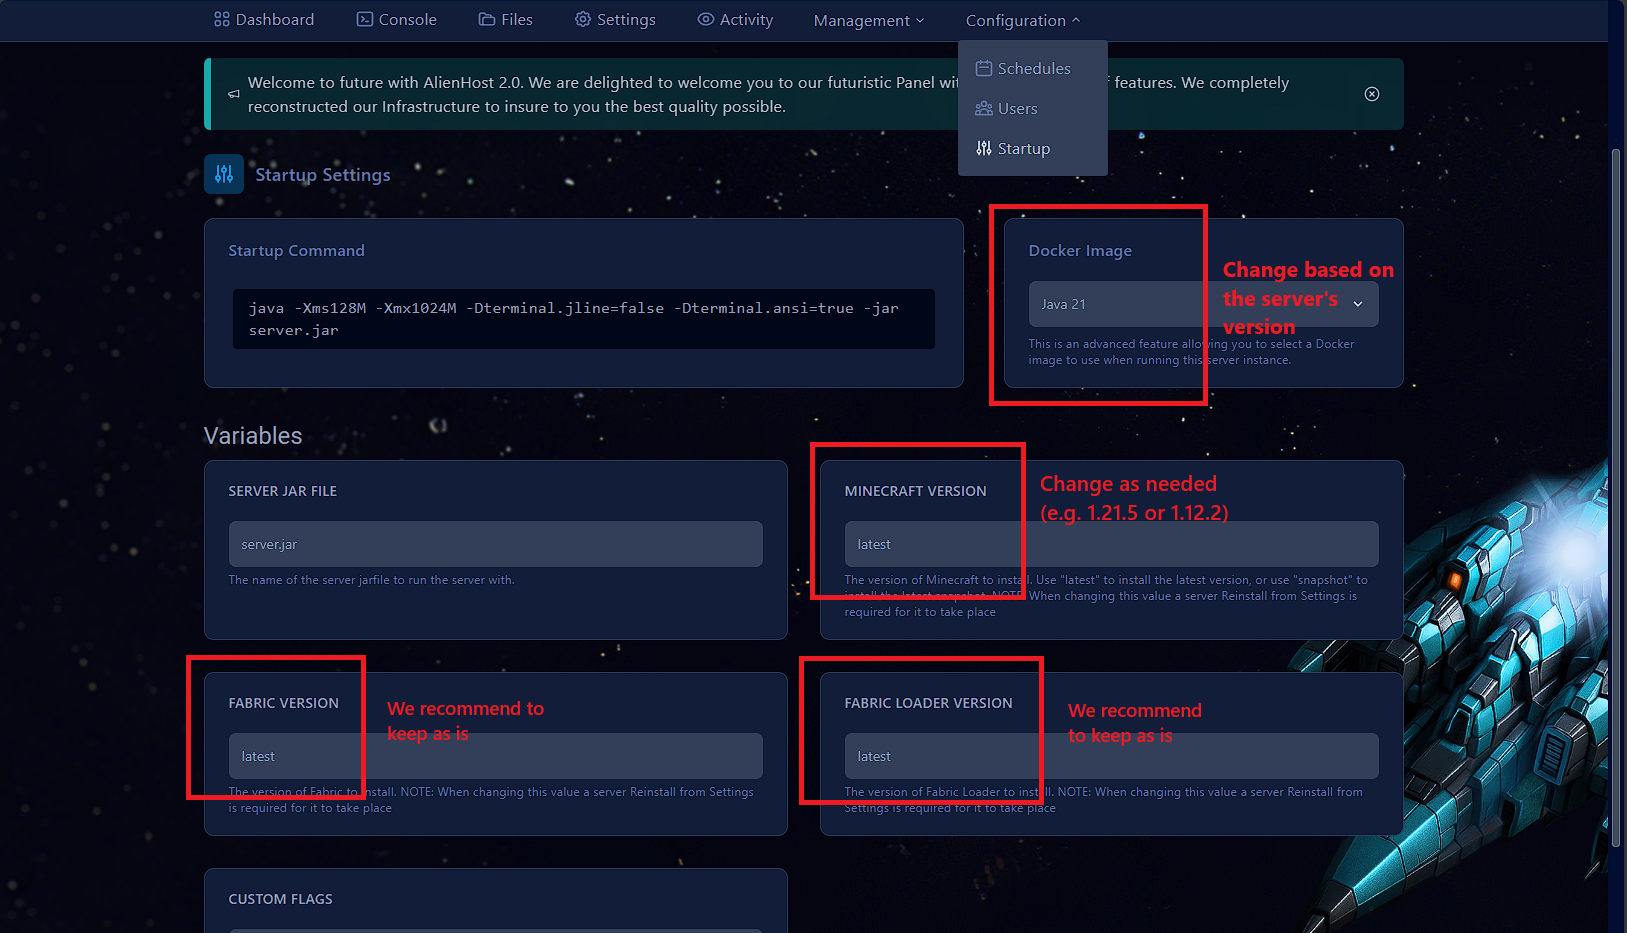
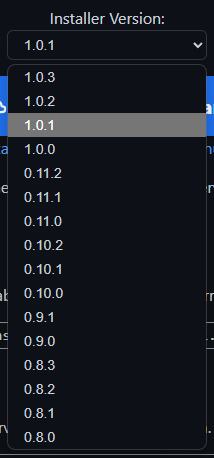
Note: The Fabric Loader Version is the installer's version. As shown below
Downloading the Modpack
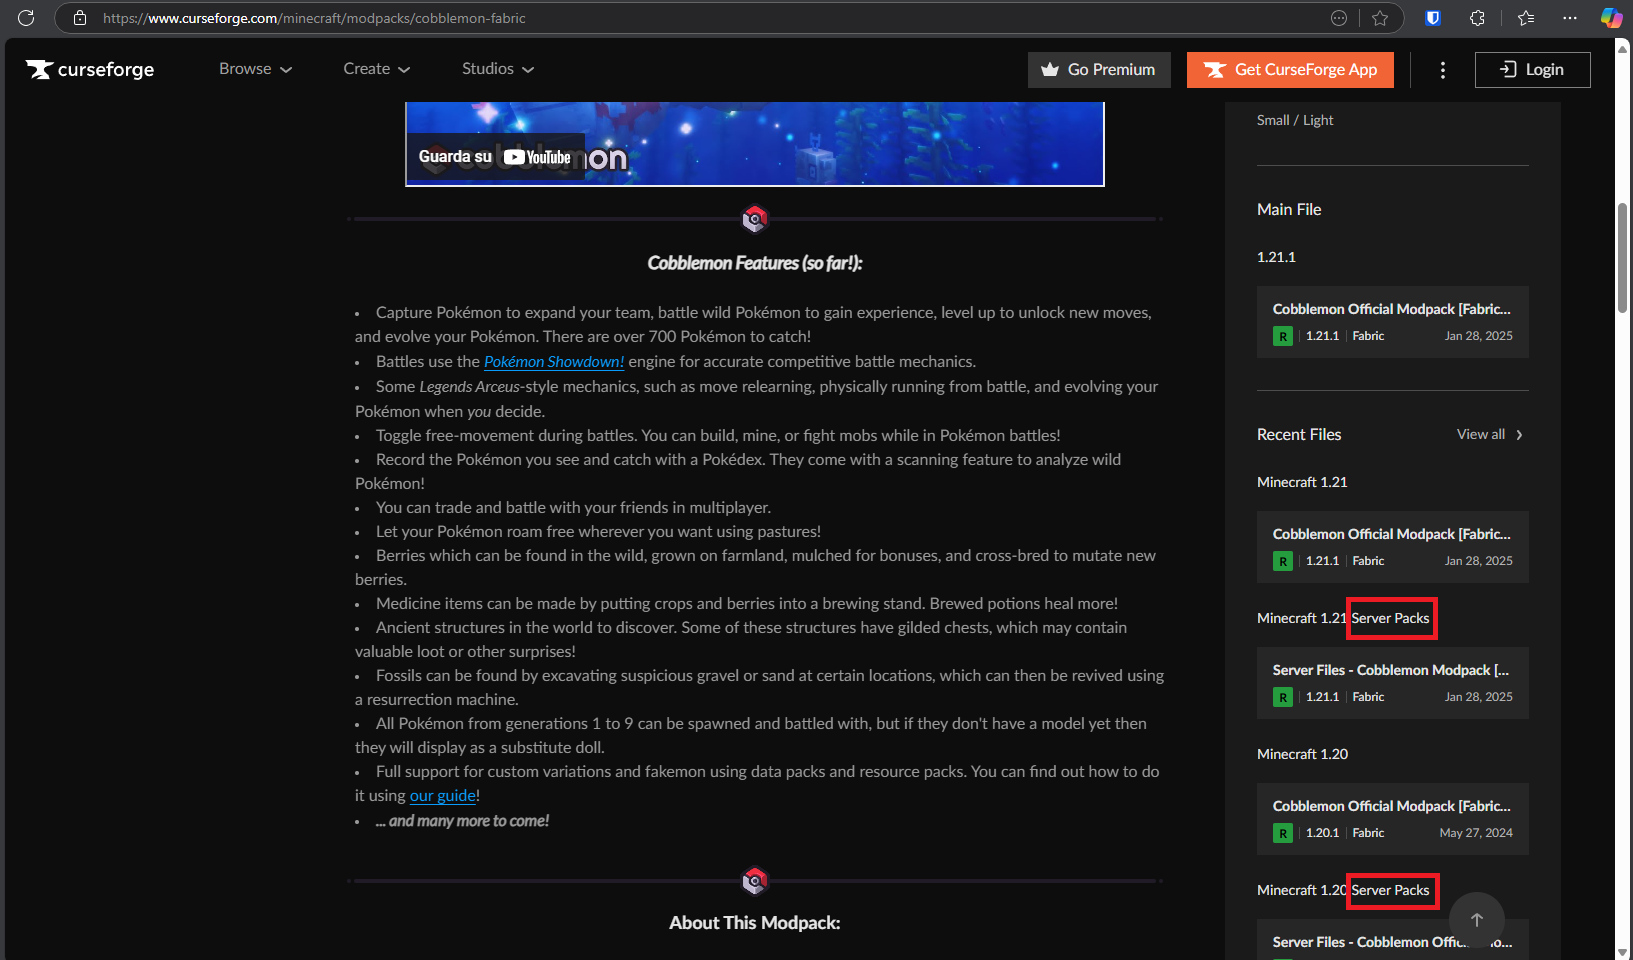
Step 3: Download the modpack you want, from the CurseForge website. I'll be downloading Cobblemon.
Step 4: Download the server pack of the modpack. There are 2 ways.
1st method: Scroll down, and on the right you'll find these (check image below)
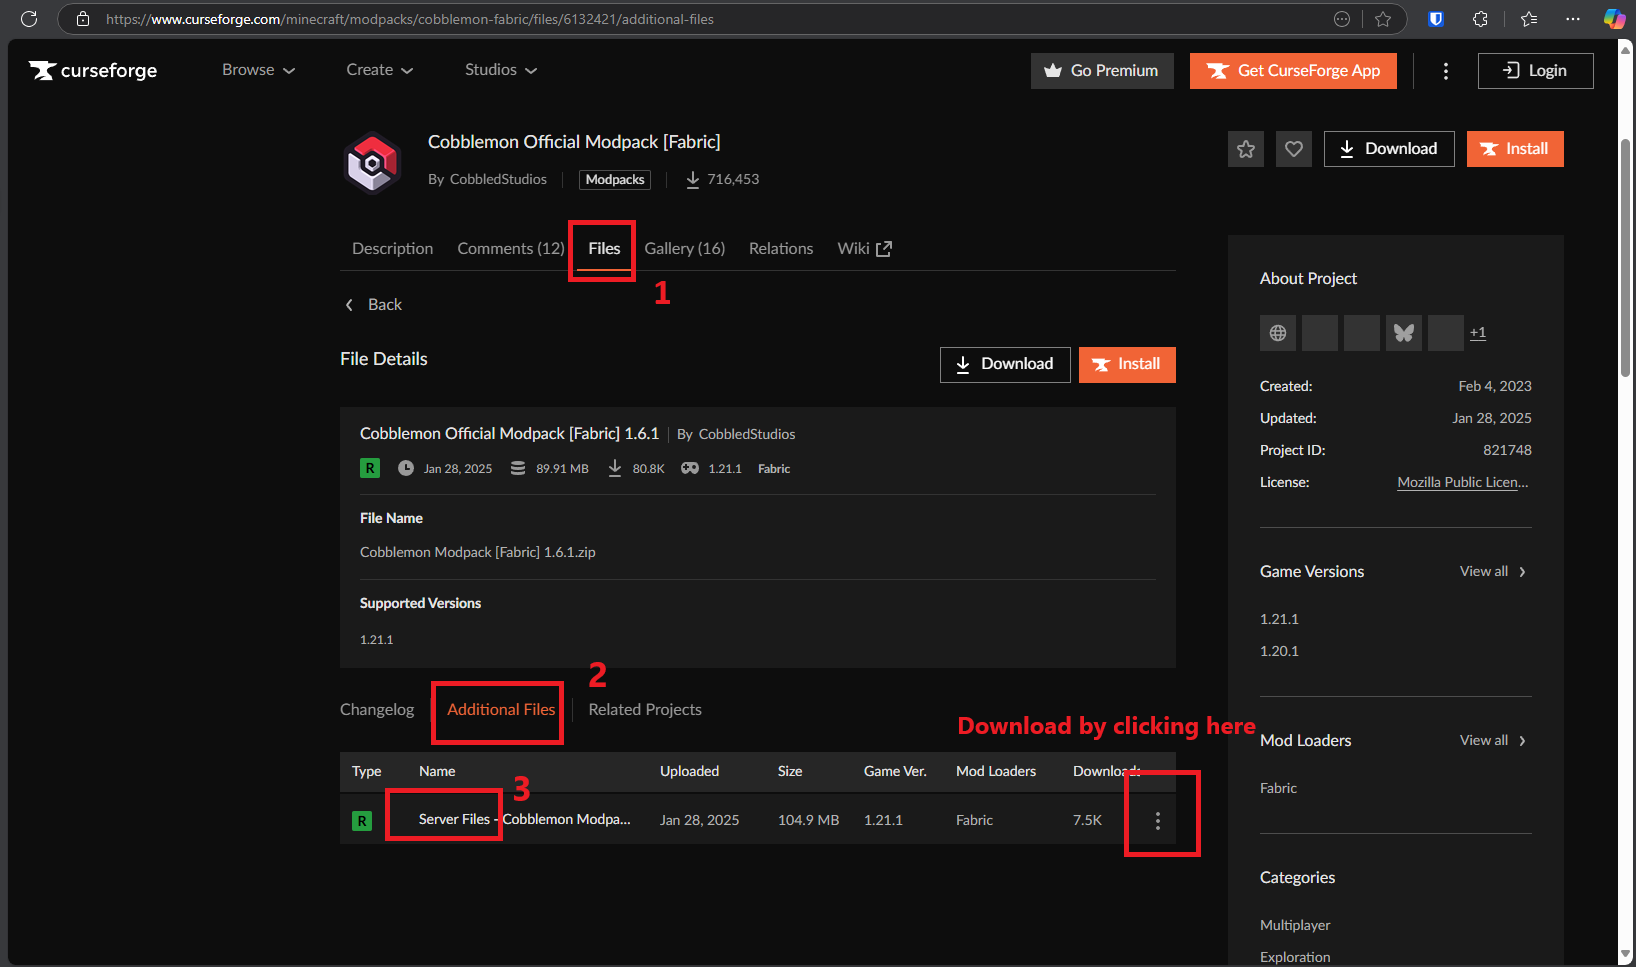
2nd method: This one will always work. When you've opened the modpack's webpage, click on "Files", then "Additional files" and to download the modpack, click the 3 dots.
Uploading the files
Follow this guide. Make sure you have WinSCP installed.
Before uploading your files, unarchive/unzip your modpack.
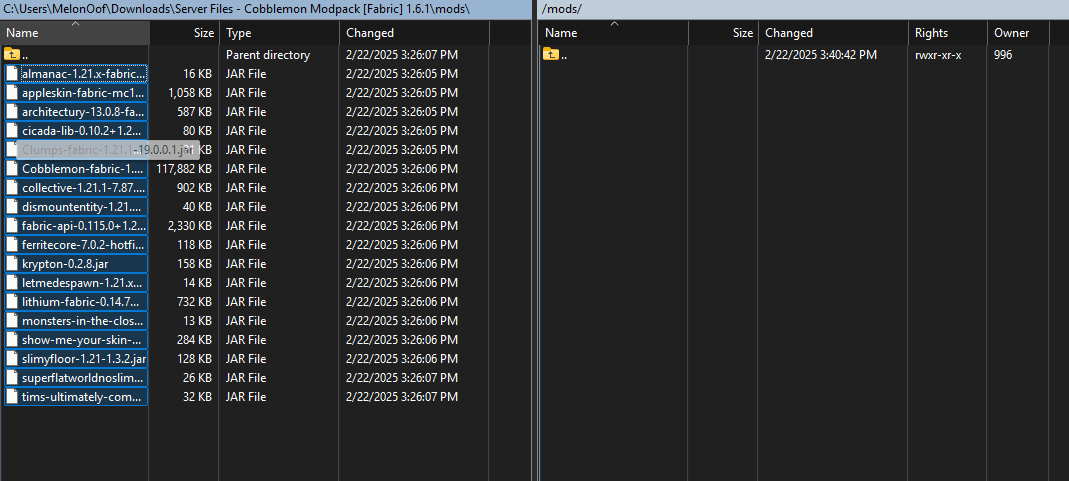
Select all the files on the left of the screen and drag to the right side. (Don't drag on a folder)
With this modpack we can just double click on the mods folder on both sides. And upload the files, as the other ones in the modpack aren't essential.
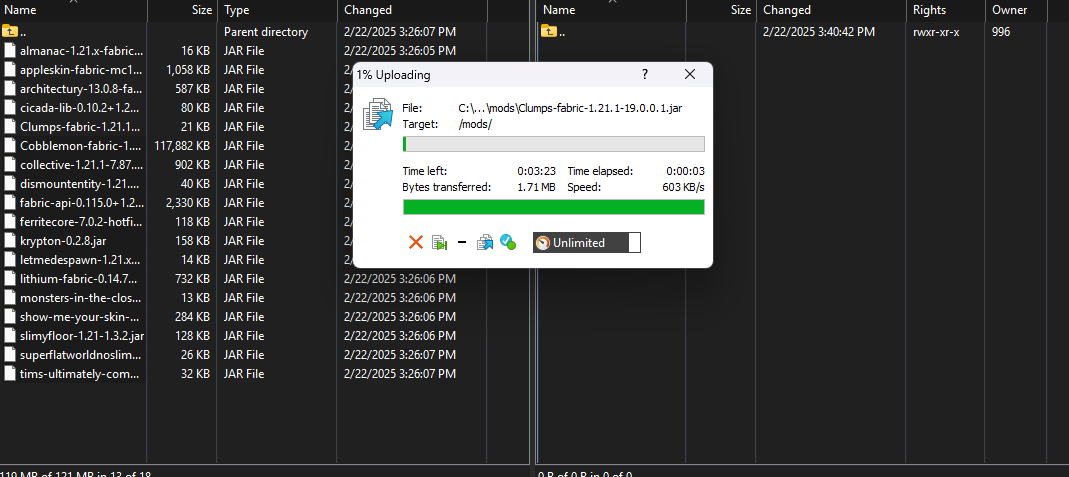

Now you can close WinSCP
Restart your server
Go back to the panel. Restart the server.
Troubleshooting
Upload doesn't work? Make sure your internet is stable and your server has enough space.
Server crashing? Make sure the modpack's version matches the server version. Also make sure you're using the correct Java version for the server.
How to install Forge modpack
Before installing your modpack there are a few things we need to do before hand to set it up.
You may also use the modpack installer on our game panel.
Step 1: Make sure to head over to your Billing Dashboard and head to the interested server. Check the images below.


Here select the Forge egg, from the dropdown menu, toggle the I am sure about this checkbox, and press Set Ship Core

Step 2: After Completing Step 1, we now head over to our panel to config our server to run forge. To check that your server is Forge, head over to the Startup Icon on the left hand side and see if it looks like this. Check photo Below
2a. After checking, we now want to add in the correct version of you Modpack. Now head over to CurseForge Launcher and look for the modpack you want to install on your server. In this example we going to install "The Pixelmon Modpack".

2b. We want to now find the Forge Version for "The Pixelmon Modpack" but you might notice it says Forge and doesn't show any version like the other forge modpacks. What you have to do is install the modpack first on your pc and then after installing it. It should now show you the latest version. Check photos below to see.
Before Install. Only shows Forge.
After Install. It now shows Forge Version.
After Completing this, we can now add in our correct Forge Version we need to our server to run the modpack. To find what version we need, we need to grab 2 different Startup numbers. Server Version and Forge Version to find this look at the photo below.

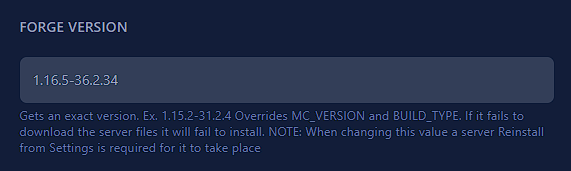
When you have the numbers, we can now add it into the Forge Version section on our startup panel. However, you need to make sure you write it correctly. Because, if you space it out or put in the wrong number your forge version will not work.
You need to write it like this:
1.16.5-36.2.34
Not like this:
1.16.5 - 36.2.34
Make sure you have no spaces and double check you have written it correctly.
Here how it should look like in the startup:
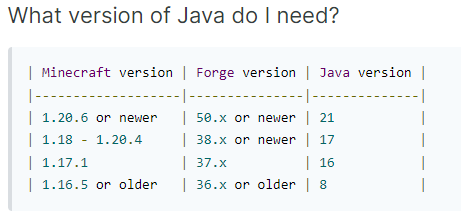
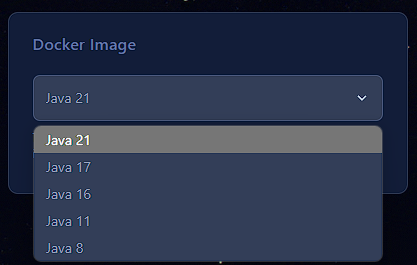
Now one more thing before we do our next step. We need to make sure we are running the correct version of Java as each modpack is different. So to run our version which is 1.16.5 we need to change our Java Version to 8. To see what version you need look at the photo below.
Change Java Version here as shown in the image.
2c. After completing those steps, we can now add in the modpack to the server. You have to delete the previous files as they aren't needed anymore (unless there is some data you want to keep).
After deleting your files head over to the Setting Icon and reinstall your server to add in the new server changes. Check photo to see.
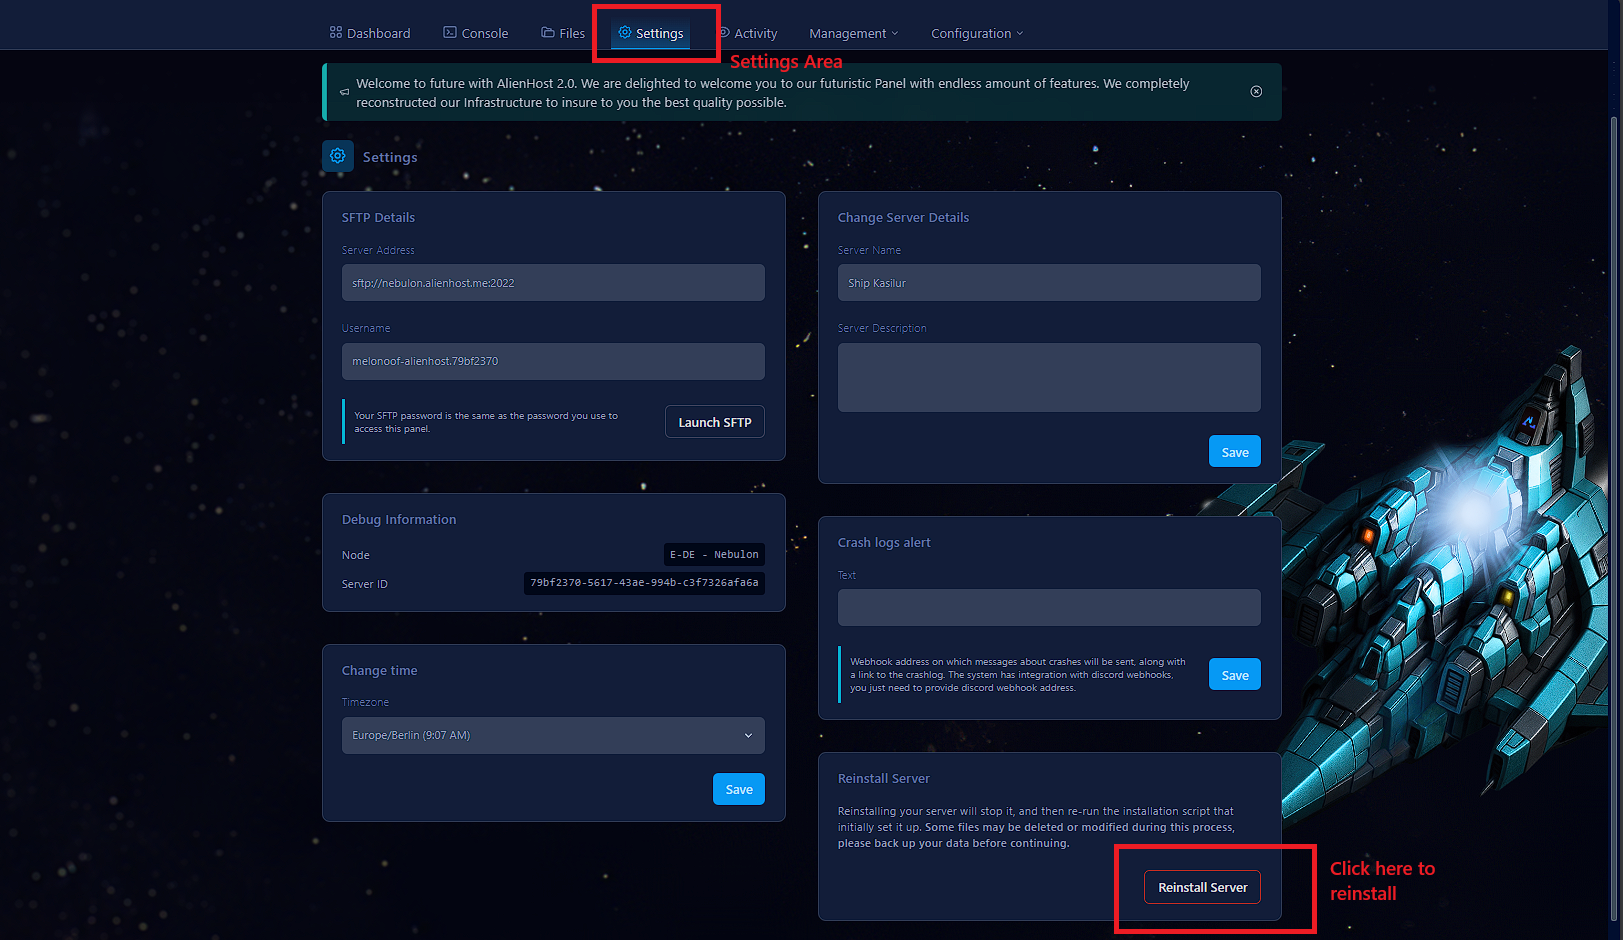
Click Yes, reinstall server, to reinstall your server.

Step 3: When you are done reinstalling your server, head over to the Console and start your server to generate new files to run your forge version. Make sure to accept EULA because your server will keep crashing until its accepted. After you accepted, you'll have to wait for a few seconds, till it fully loads.
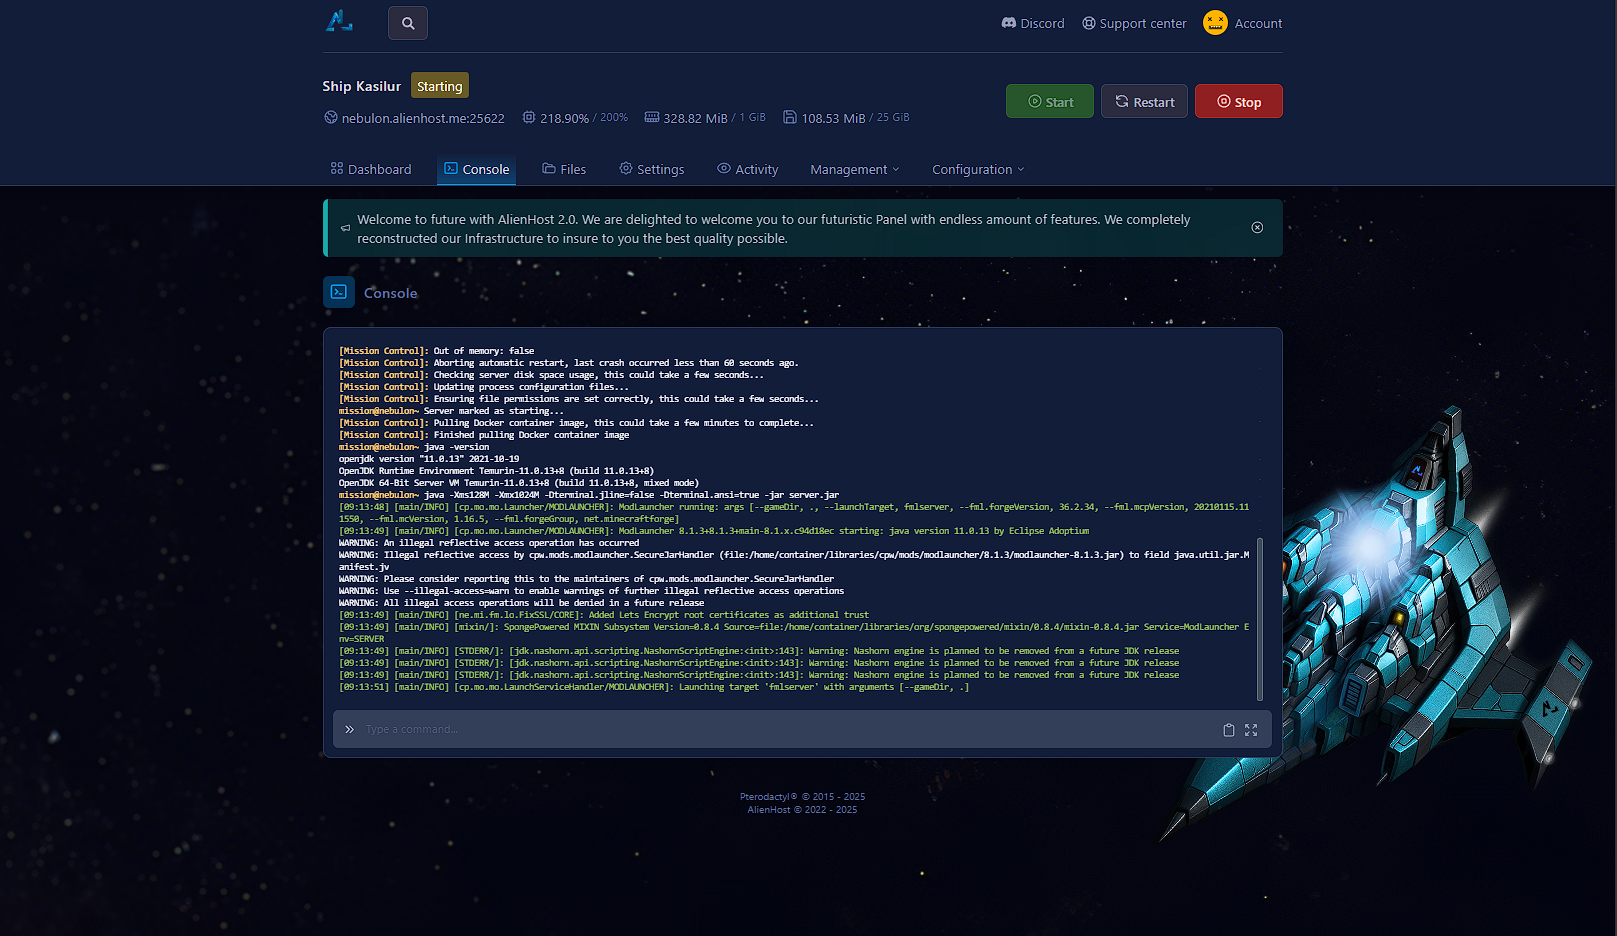
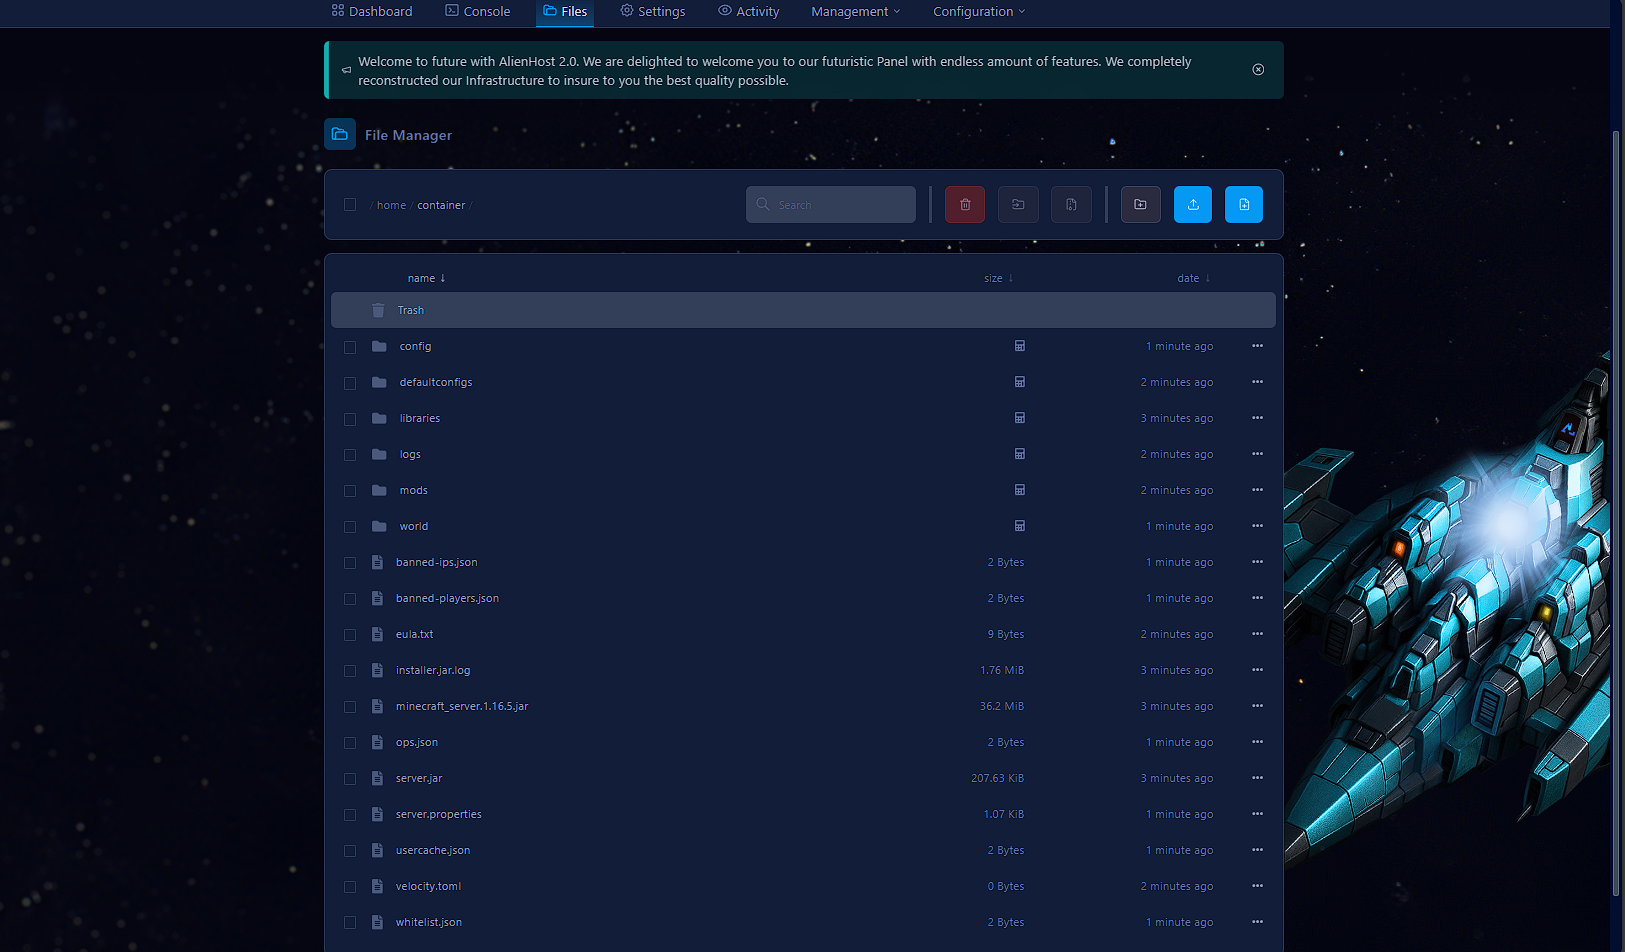
Now your files should look similiar to this. If they do, proceed by adding your modpack.
Step 4: Before adding your modpack Make sure to STOP your server!
We now want to download the server pack to run on our server. So let head back to CurseForge and click on Download Server Pack icon to install the latest serverpack on our pc. Check photo below to follow each step by step.
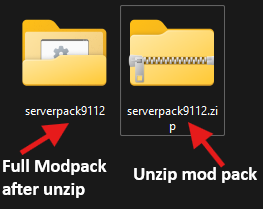
Download Modpack (CurseForge)
Unzip Modpack on pc
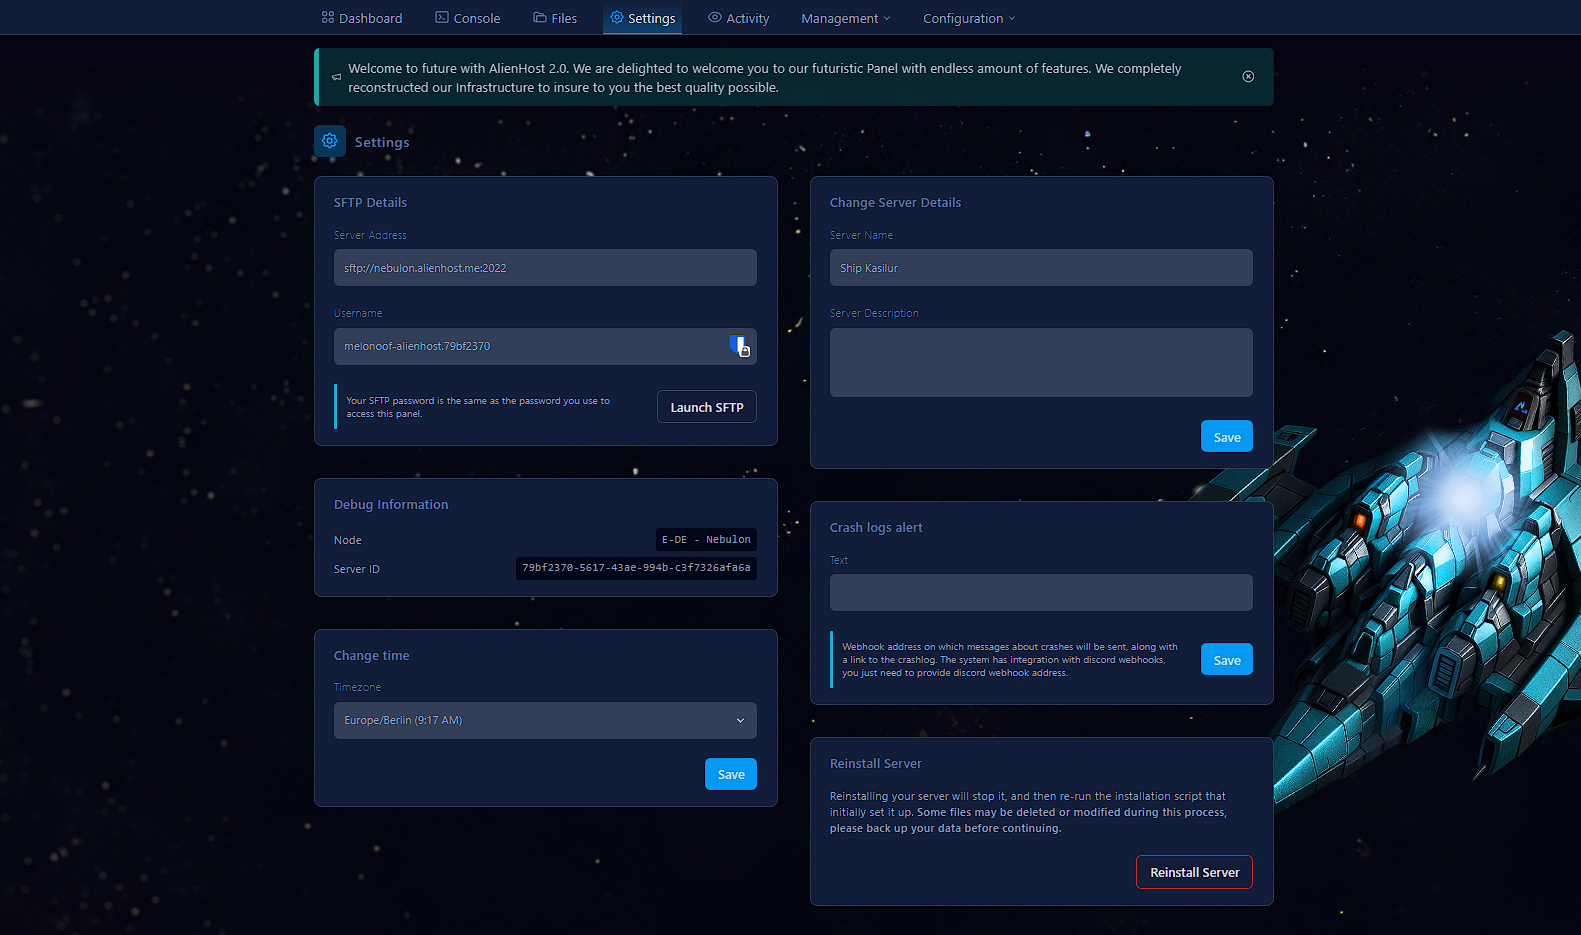
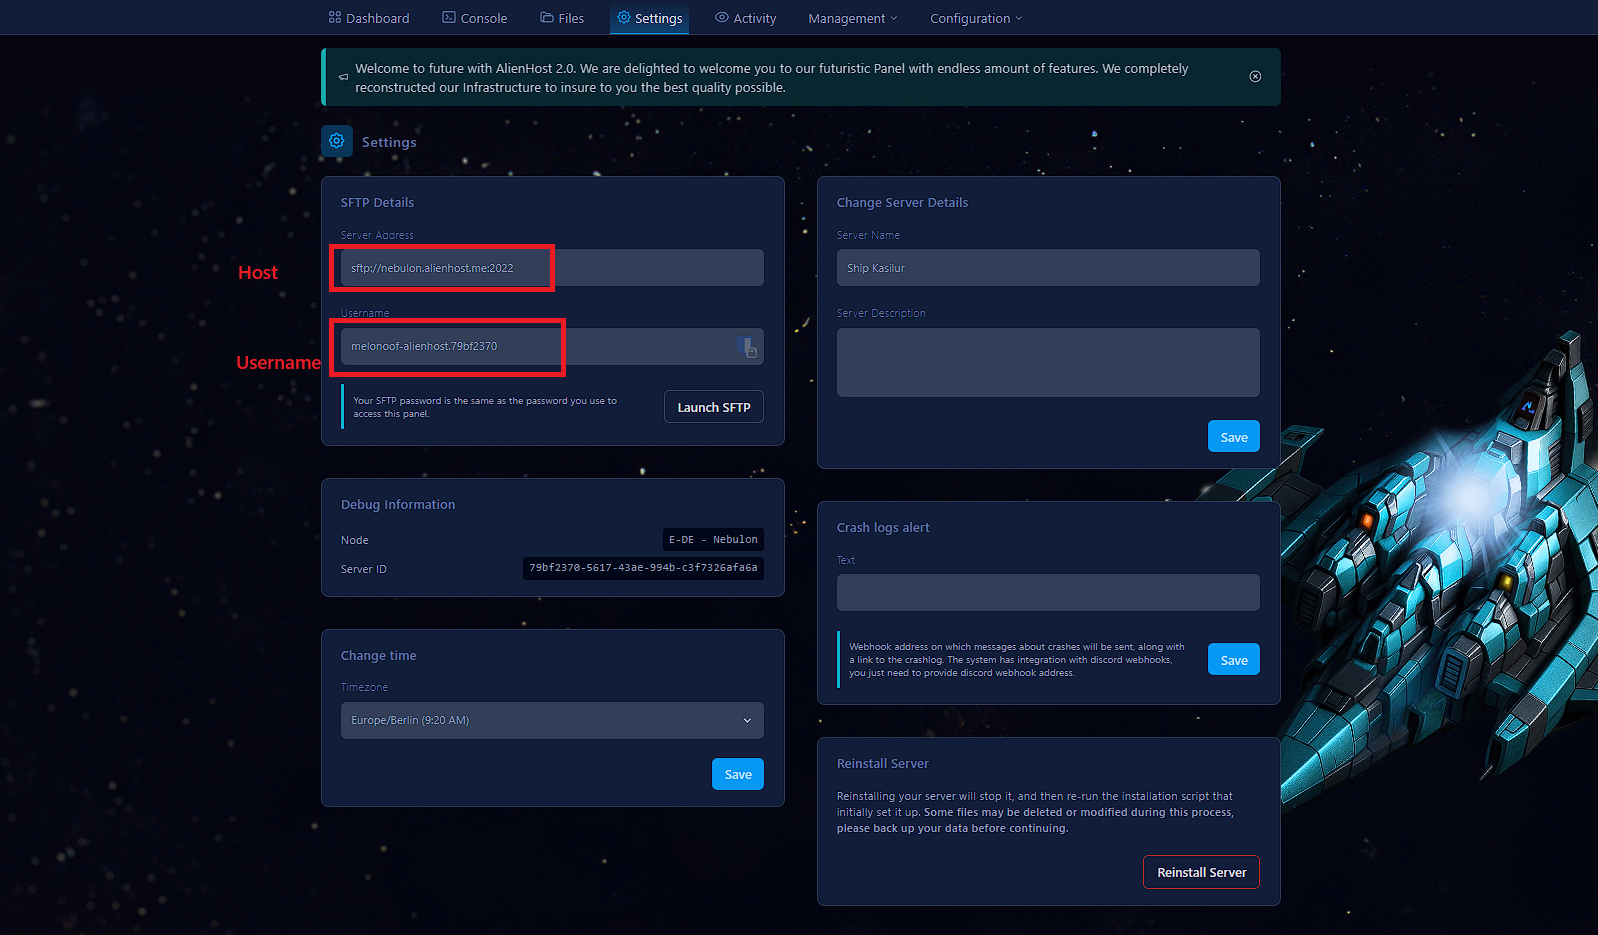
Head over to the Setting Icon and connect to your SFTP. You have two ways of doing this, you can either use WinSCP or FileZilla. Check out the photo below for which option you would like to use. Go here if you don't have either one installed How to use SFTP .
How to Connect with WinSCP:
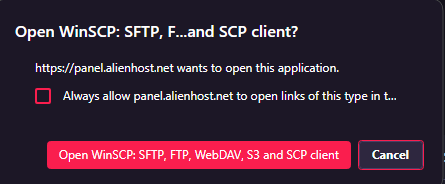
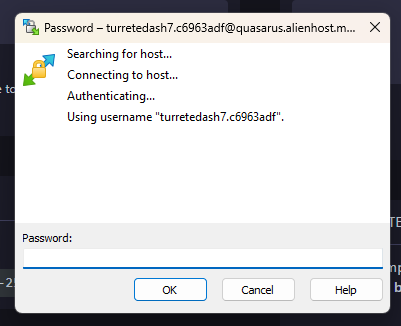
Go to setting and click Launch SFTP and you should get a pop up window, then click Open WinSCP. A popup window should show up from WinSCP and now you can enter your AlienHost Password. See photo below
Now open up your Full Mod Server Pack and transfer all of the files into the your server. It might take some time so do be patience.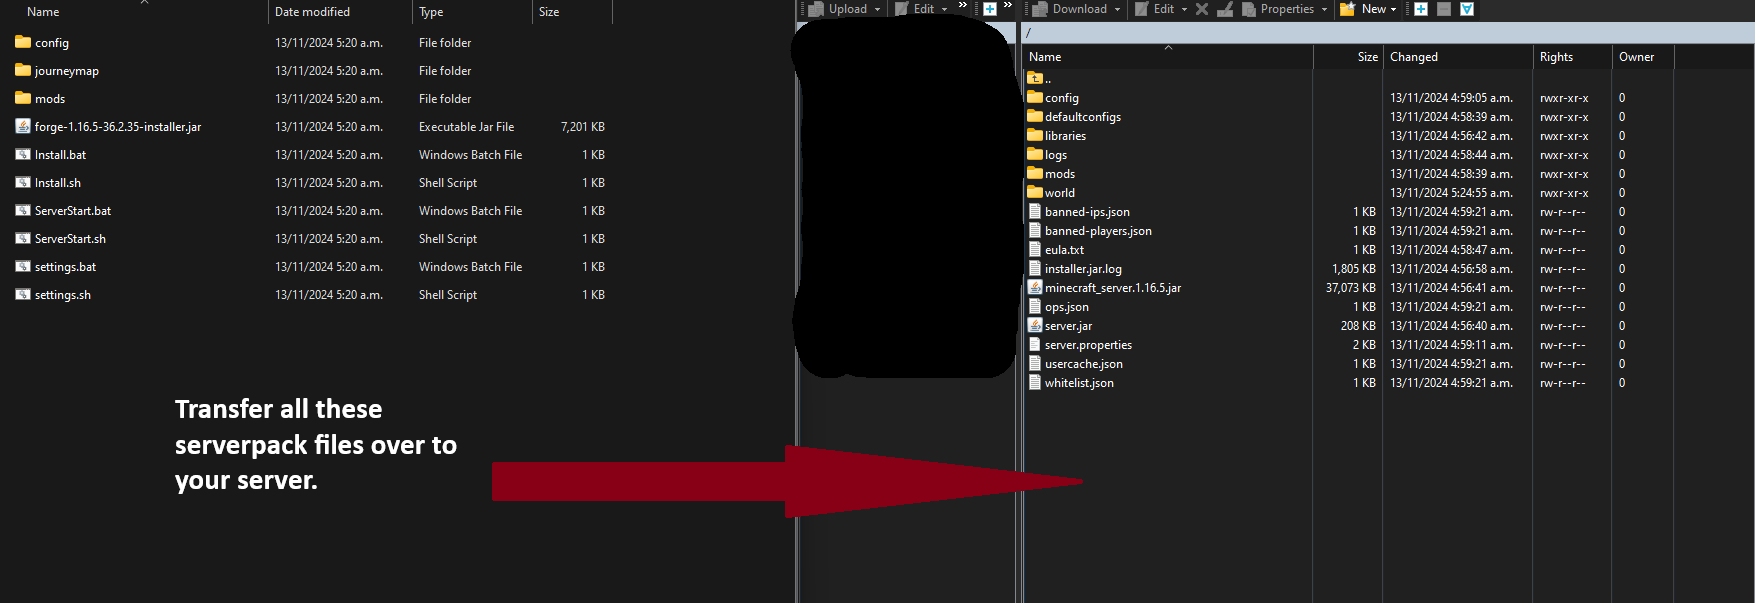
How to connect with FileZilla:
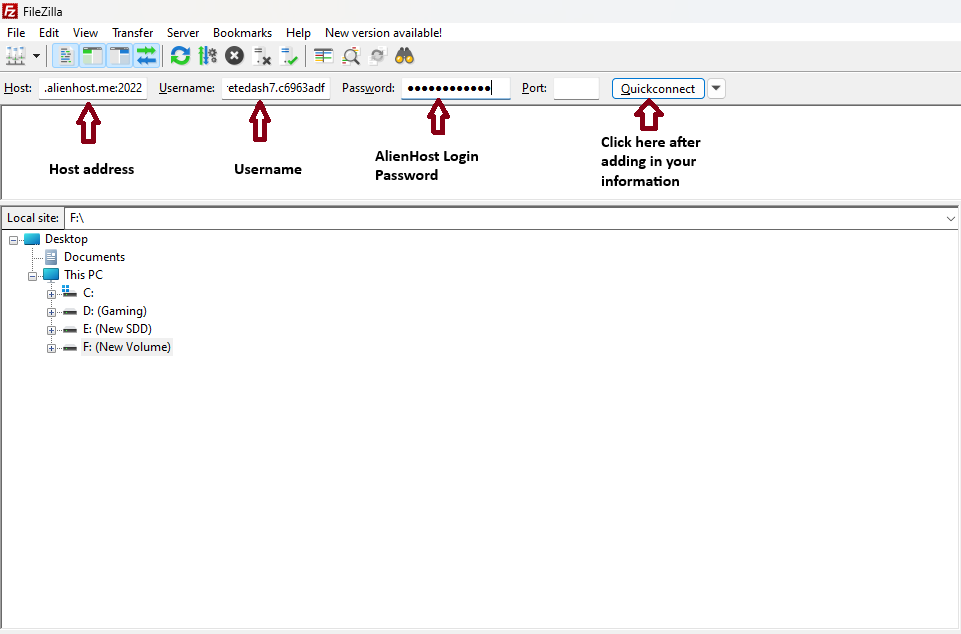
Open up FileZilla on your pc and add in your credentials. To find your credentials go back to the Setting Icon and copy your information and add to FileZilla. See photo below.
Now open up your Full Mod Server Pack and transfer all of the files into the your server. It might take some time so do be patience.
After completing these steps you can now start your server. It might take a bit for server to start up, as this all depends on how big your modpack is.
Step 5: Now launch up your game and head over to multiplayer and add in your server IP address. To find you IP Address click this link How to get you IP . Now you should see your server, however you might see a big Red X under the ping. You don't need to worry as this won't affect anything.

We hope this tutorial has helped you with how to install a Forge Modpack. If there are any question feel free to make a ticket in discord.
Velocity
Velocity, a proxy backed by the PaperMC Team and its contributors.
How To Setup Velocity
Where to get Velocity server jar?
The official version of Velocity can be found here
A fork I (MelonOof) would recommend is this one (download the one named in the following format: velocity-proxy-{version}-all.jar if you are planning on choosing this one)
How to install the server jar for the first time
Access to the server's panel
Go to your file manager and upload the downloaded jar file.
Make sure its name matches the server jar file variable in the startup page.
Next start your server, after some seconds, every file will generate.
Adding Backend Servers
Press CTRL + F and search for [servers]
You'll find something similiar:
[servers]
# Configure your servers here. Each key represents the server's name, and the value
# represents the IP address of the server to connect to.
lobby = "127.0.0.1:30066"
factions = "127.0.0.1:30067"
minigames = "127.0.0.1:30068"You can delete those if you needed, but if they are adequate, just replace the IP address between the quotation marks.
Or if you want to add a new server, add a new line and on that line write the information regarding your backend. Example:
survival = "127.0.0.1:25565" (makes sure the backend's actual IP address and port)
You'll have something like this:
[servers]
# Configure your servers here. Each key represents the server's name, and the value
# represents the IP address of the server to connect to.
lobby = "127.0.0.1:30066"
factions = "127.0.0.1:30067"
minigames = "127.0.0.1:30068"
survival = "127.0.0.1:25565"The last steps on velocity
Press CTRL + F and search for player-info-forwarding-mode
By default it's set to "none" we recommend you to set it to "modern". Do note that the proxy won't support versions below 1.13, nor clients below 1.13, if you want to support such versions you may want to use "bungeeguard" forwarding at your own risk, as we won't cover it within this guide.
After setting the forwarding mode to modern, copy the string within forwarding.secret file.
Configuring the backend
In the file manager follow the following folders path: /config/paper-global.yml. Open the paper-global.yml
CTRL + F and search for velocity you'll find something similiar to this:
proxies:
bungee-cord:
online-mode: true
proxy-protocol: false
velocity:
enabled: false
online-mode: false
secret: ''Here set enabled to true (the one on line 6 in this scenario), set online-mode to true if it isn't already and within the single quote marks paste the content you copied from the forwarding.secret file from the proxy.
Go back to the main directory and access the server.properties.
Set online-mode=true to online-mode=false
Add other backends
Follow the steps from Adding Backend Servers to Configuring the backend