Standalone (Bukkit/Spigot/Paper etc...)
Make sure you have opened a port first if didn't or don't know how to, here a tutorial
1. Start
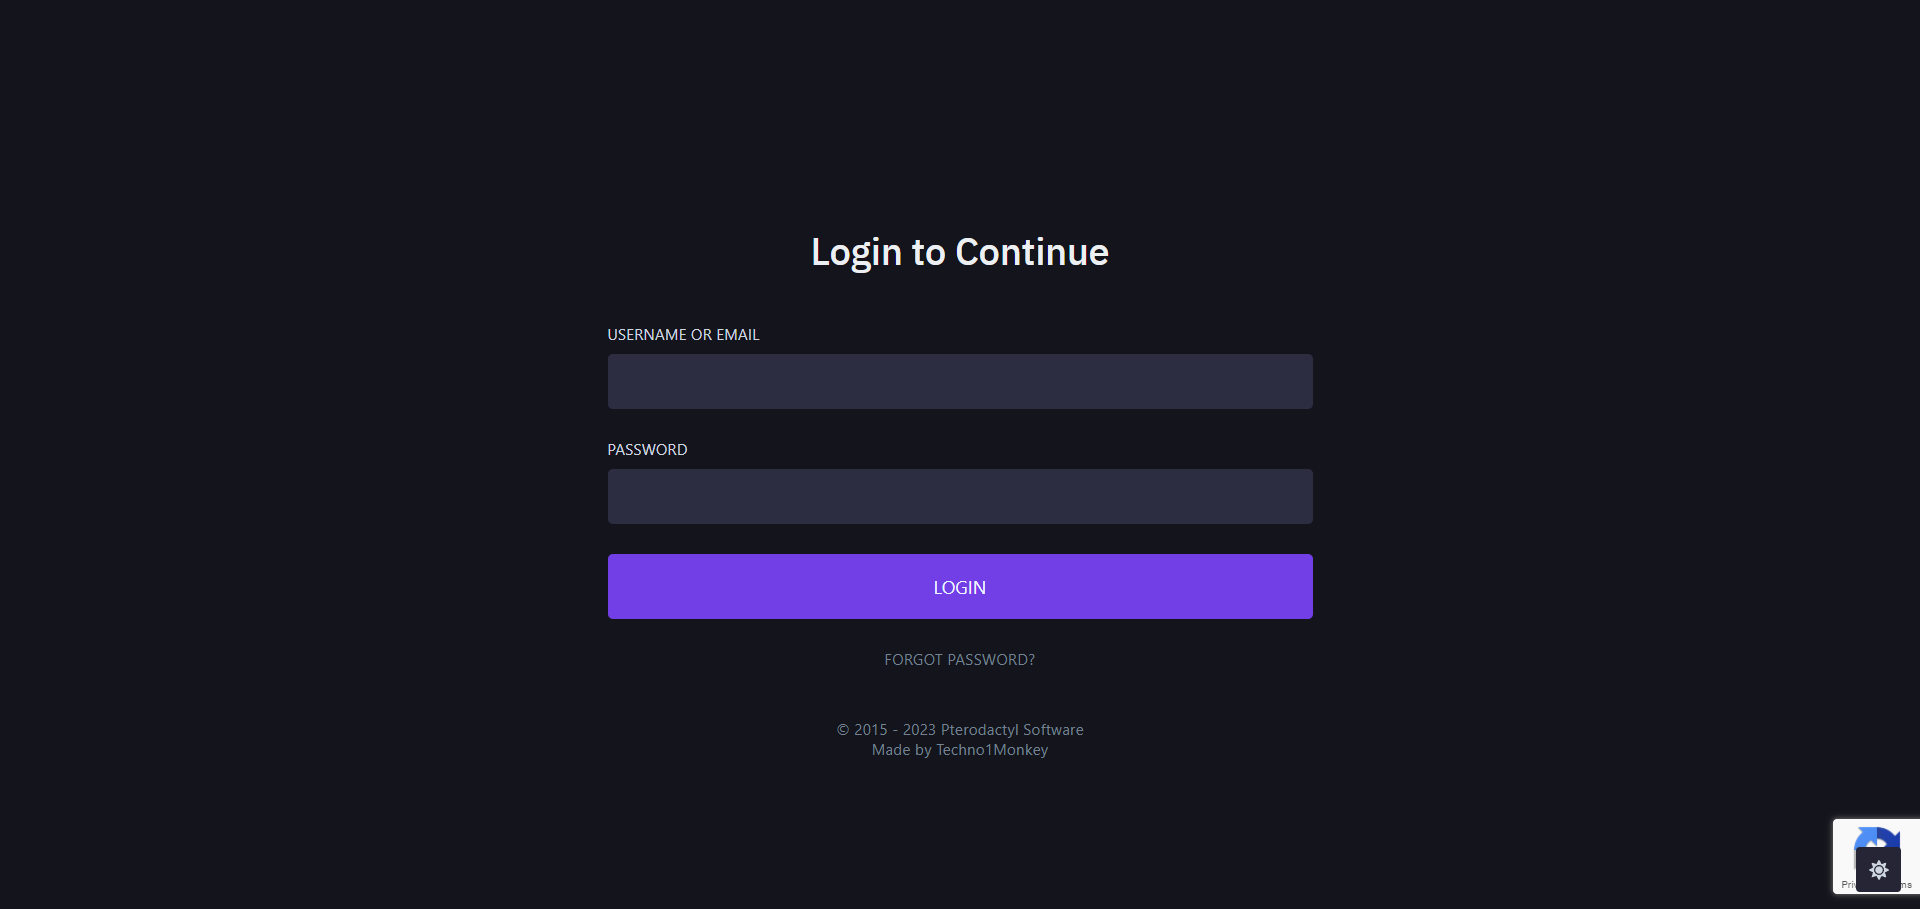
Get started by logging into the panel here
2. Panel
After logging into your account (or if you already were), click on the server you want to have voting on.
3. Navigate to the directory
Start your server if it wasn't
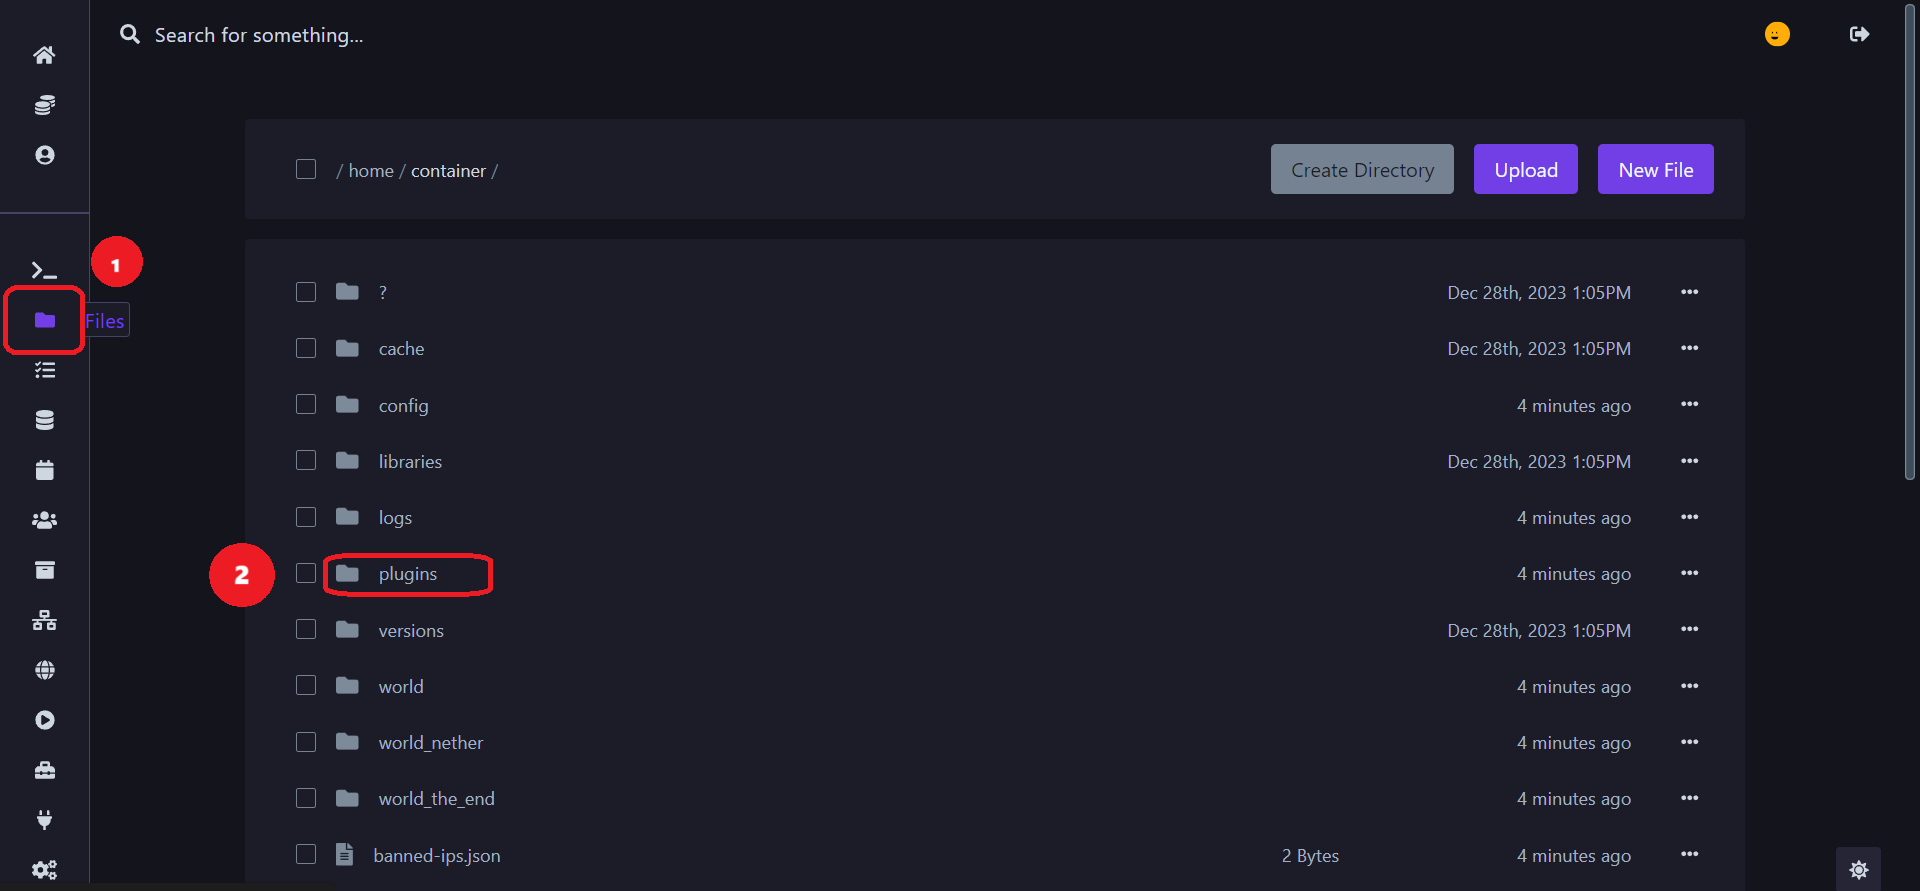
- Go to the file manager
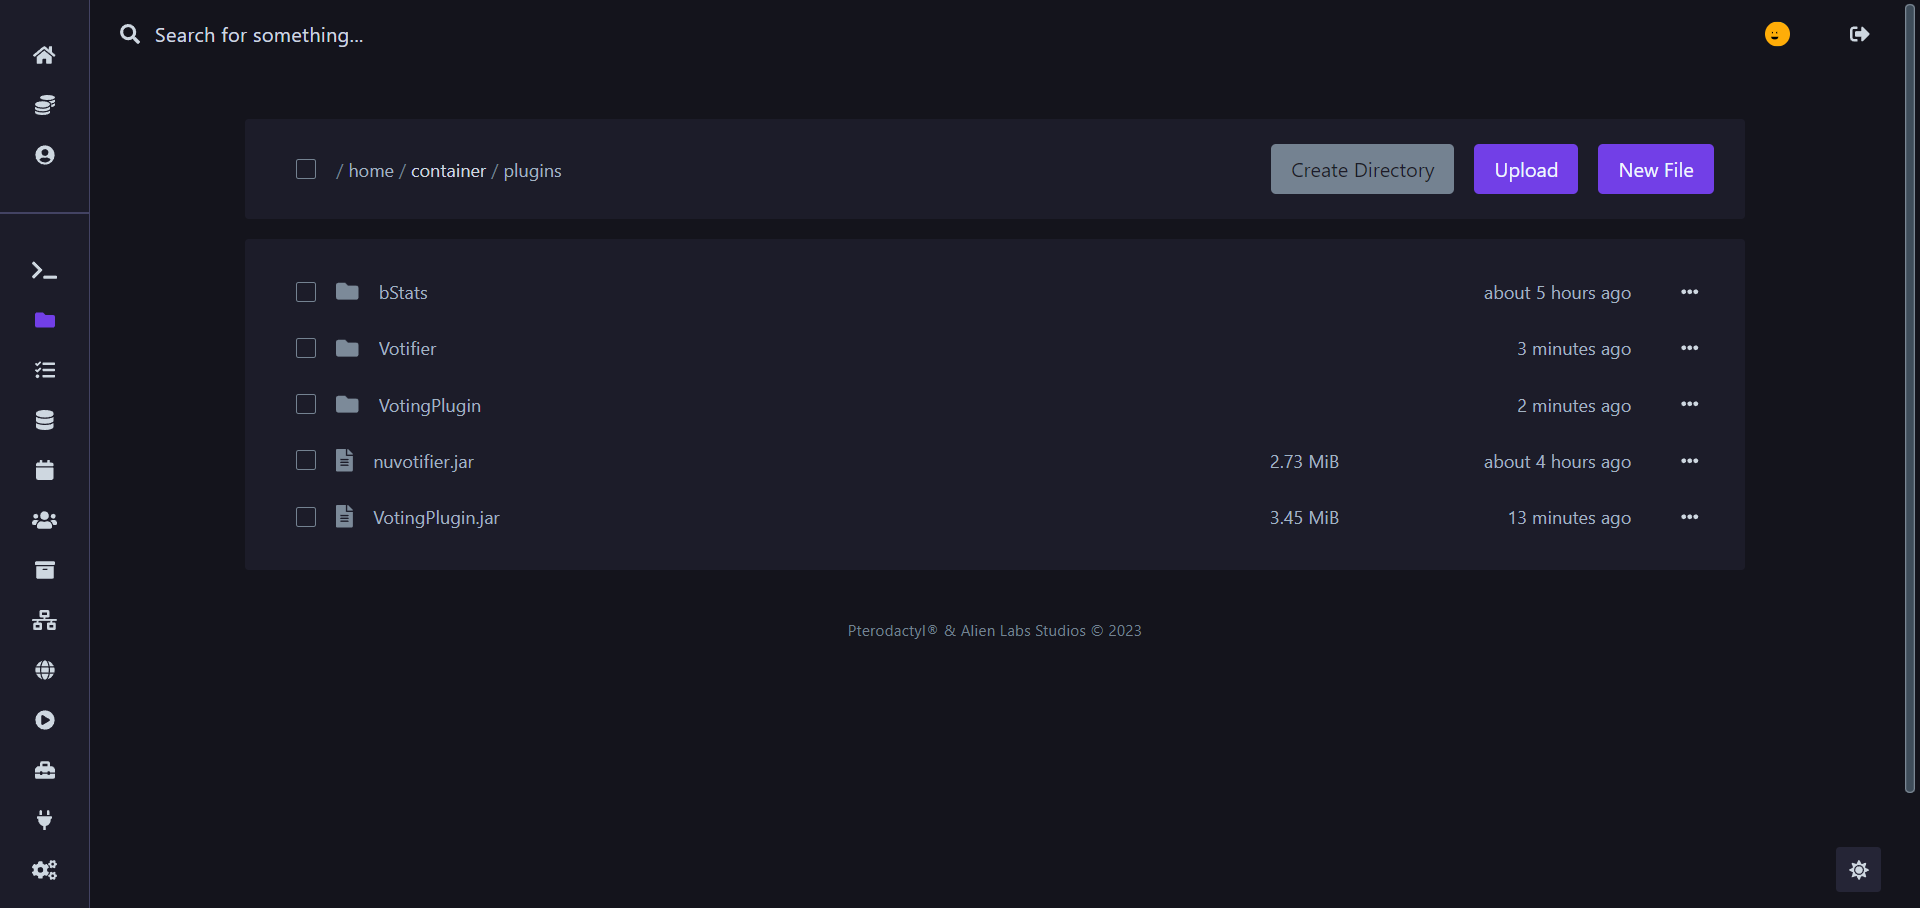
- In the file manager, navigate in the plugins folder
3a. Upload the files
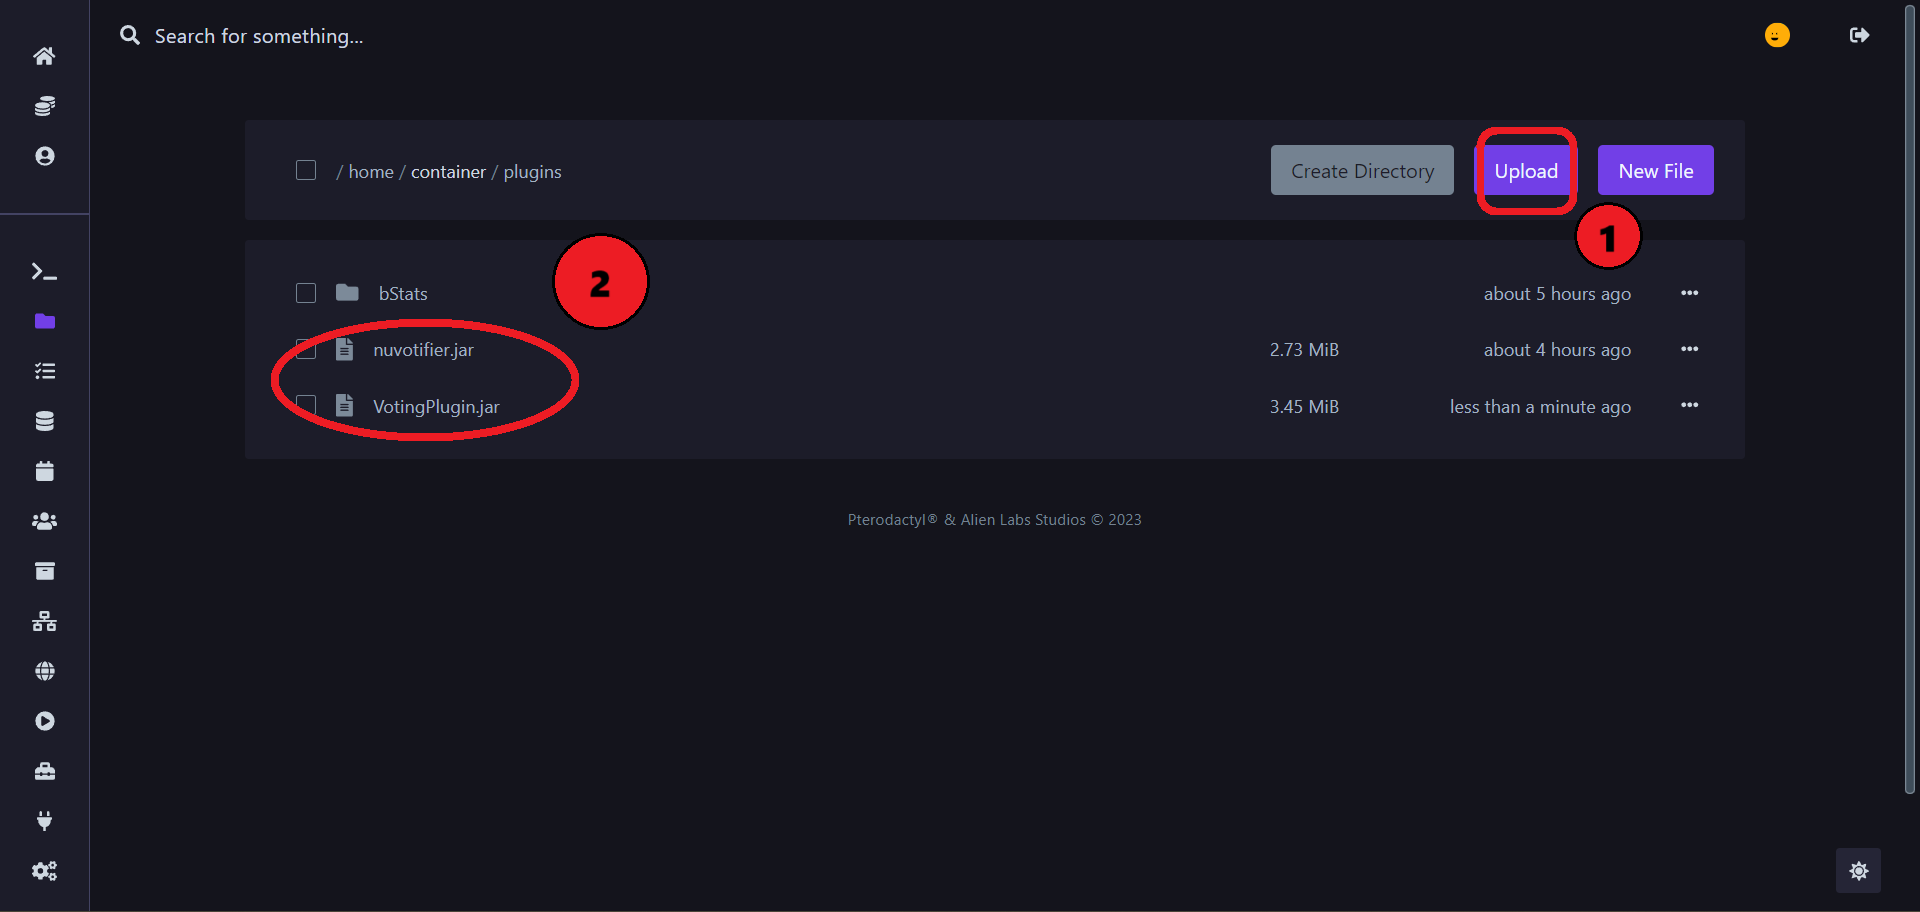
When you are inInside the plugins folder upload NuVotifier & VotingPlugin
-
Upload them by clicking the upload button
in the top corner, on the right(shown in the picture below) -
AfterTheuploadingfilesandwilllettingappearit load intoin thefolderfileandmanageryou'll seewhen thenuvotifier.jaruploadandhasVotingPlugin.jar appearing, it should look similiar to this:finished
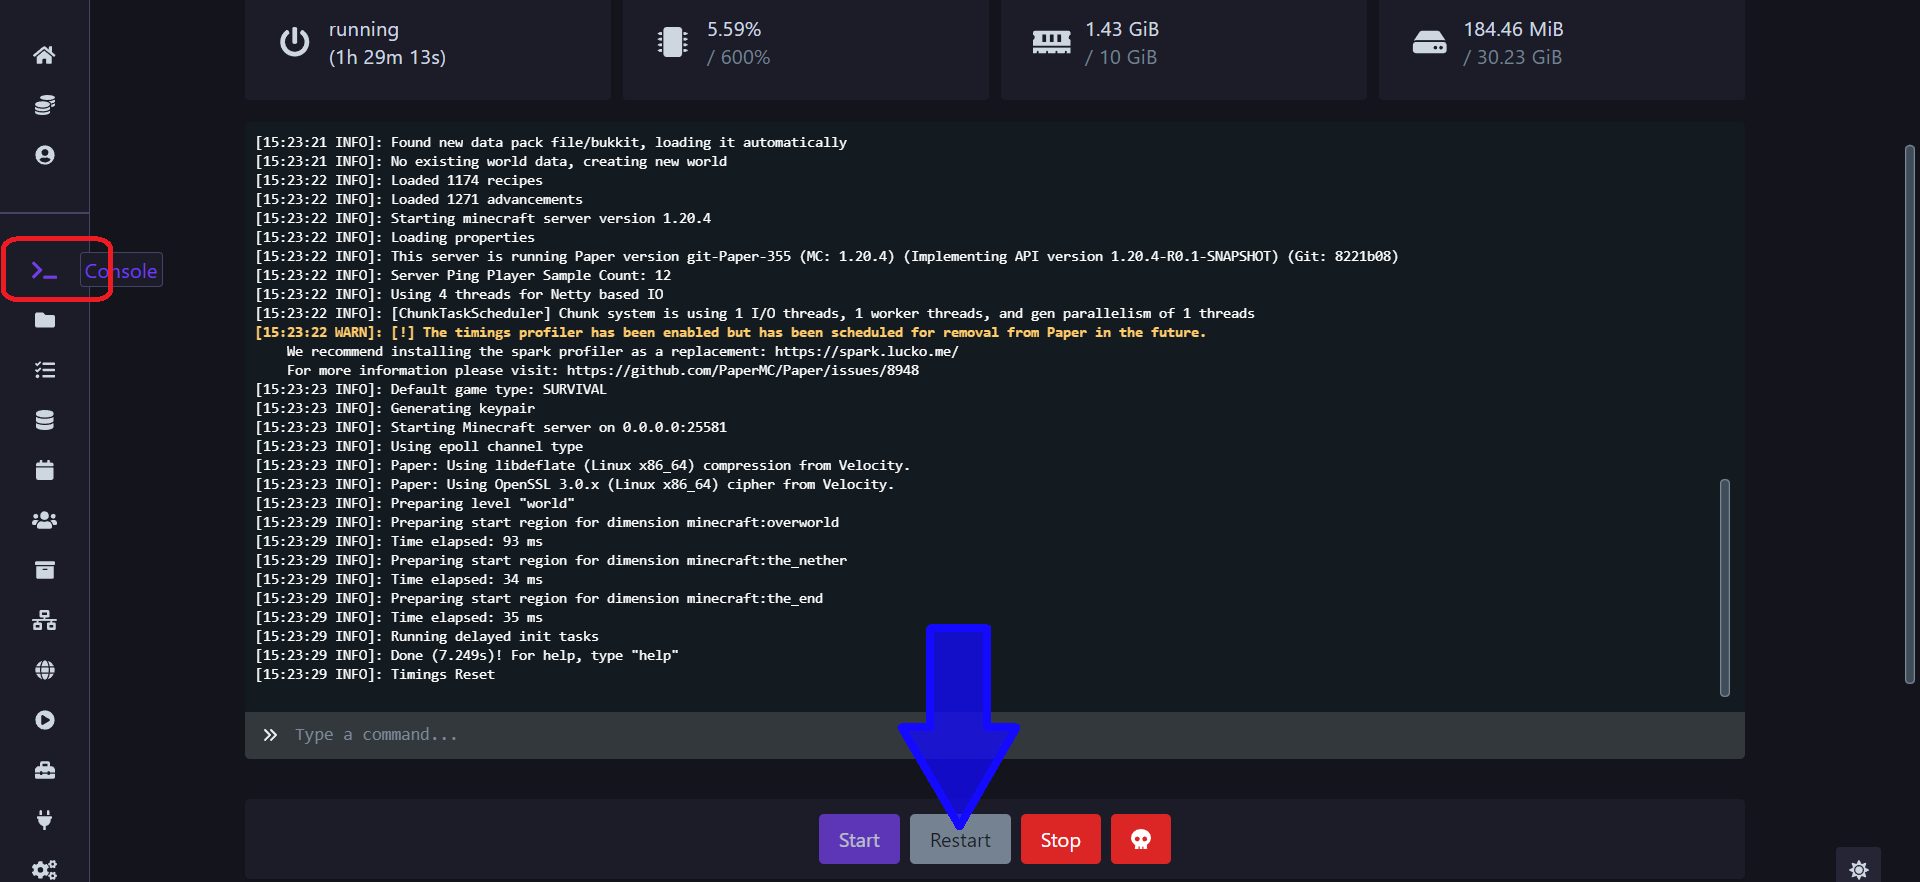
4. Restart the server
Now goBack to the consoleconsole, andpress restart your server
5. Configure
Now go back to the plugins folder like you've done in step 3 and 3a where you will find two folders named "Votifier" and "VotingPlugin" appearing. Click on Votifier's folder
6. Config.yml
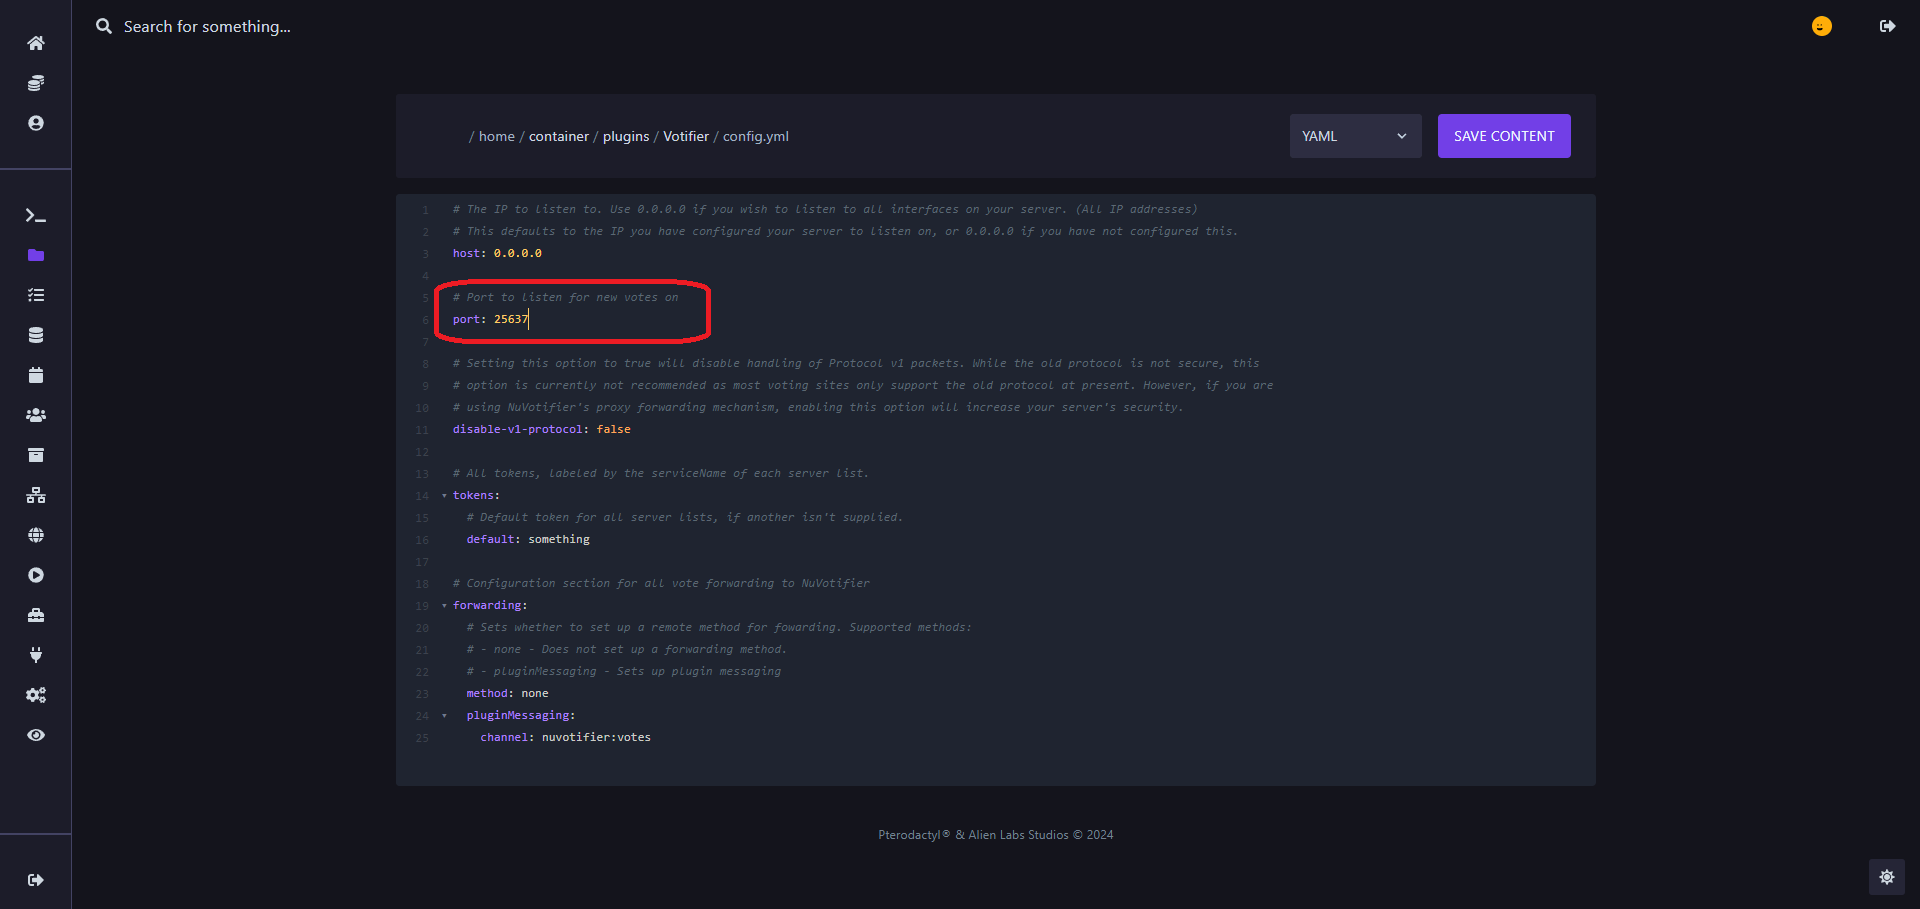
- Inside the Votifier's folder open the config.yml and modify the port variable to the one
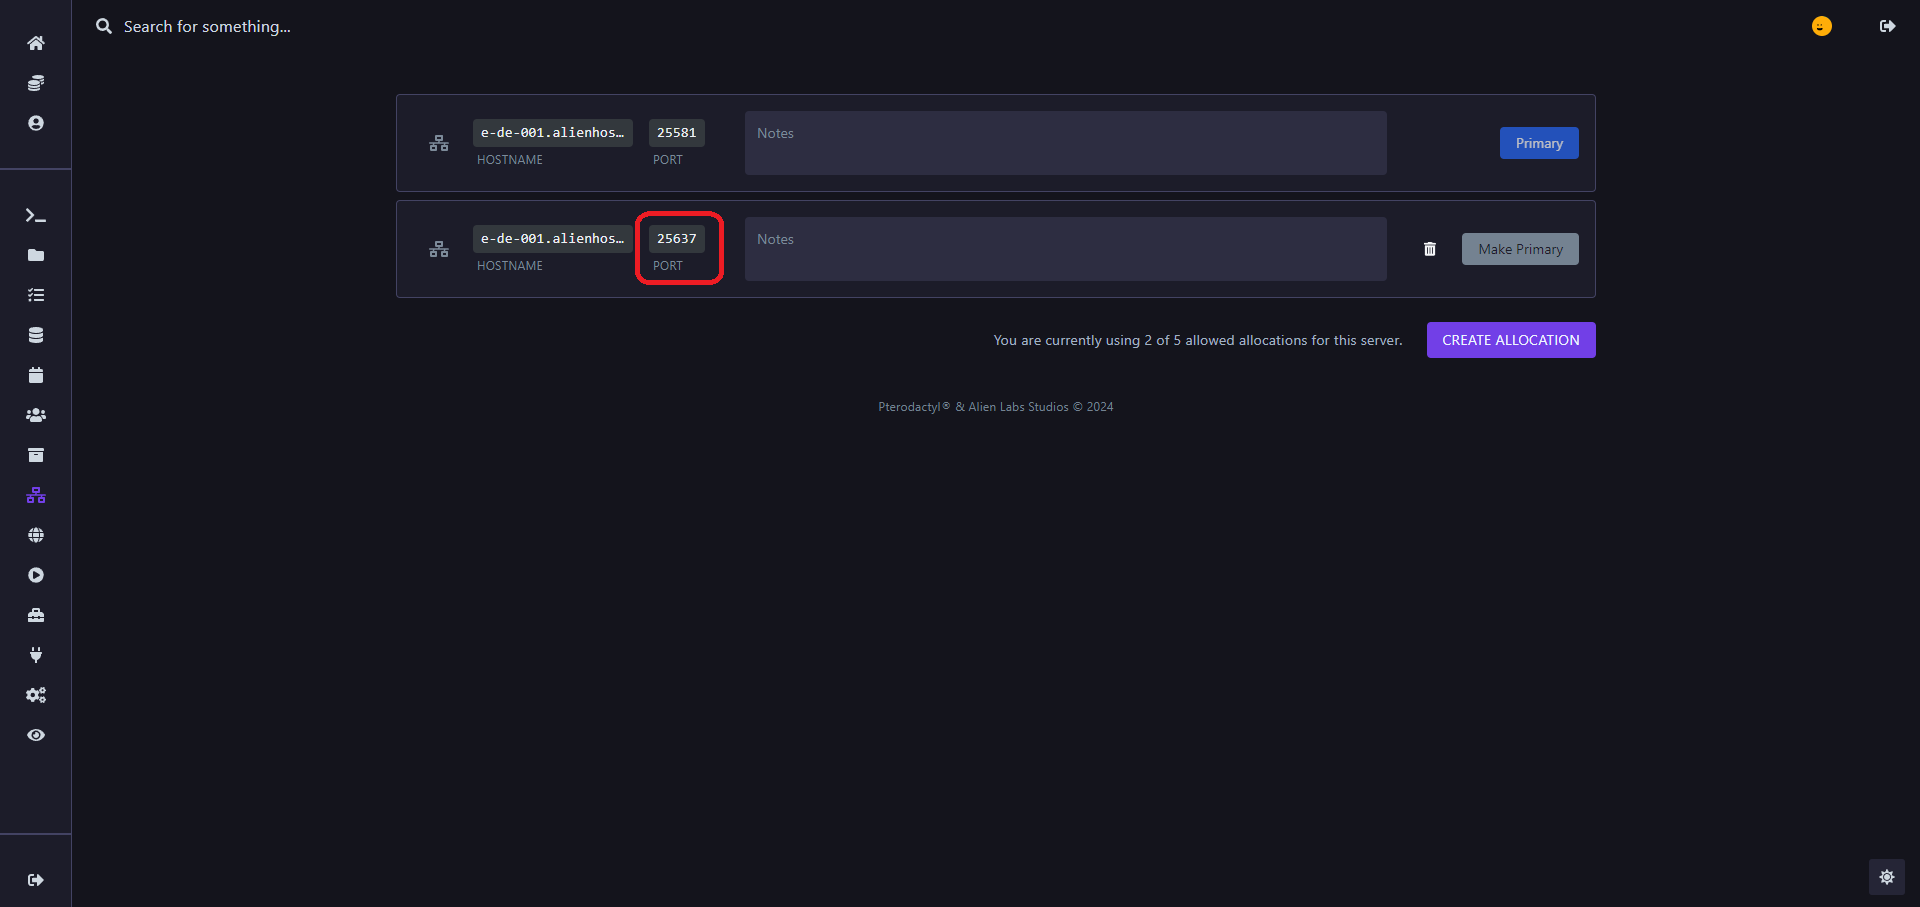
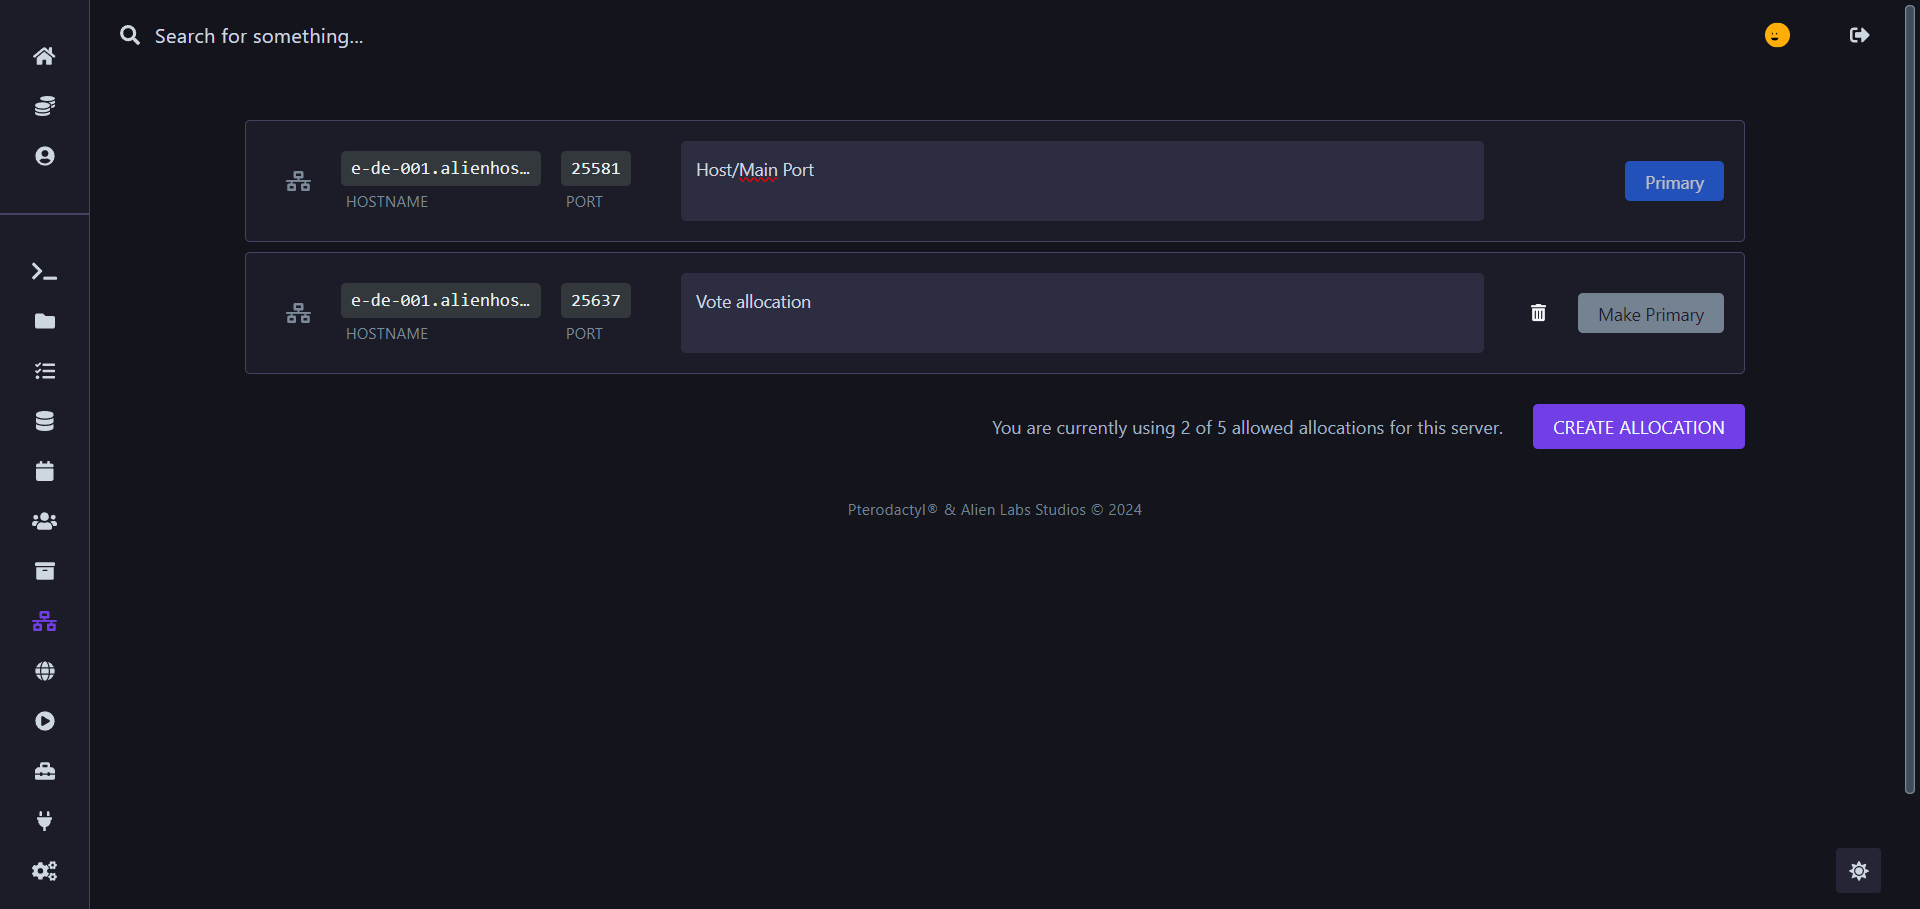
you've beengiven in the network tab in my case, the port is 25637, in yours itmightmay be a different one. - After copying the port in the network tab, go back to your config.yml in plugins/Votifier/config.yml and paste your
givenallocated portoverin thedefaultportportvariable (which is 8192, but its most likely you dont have that one allocated)
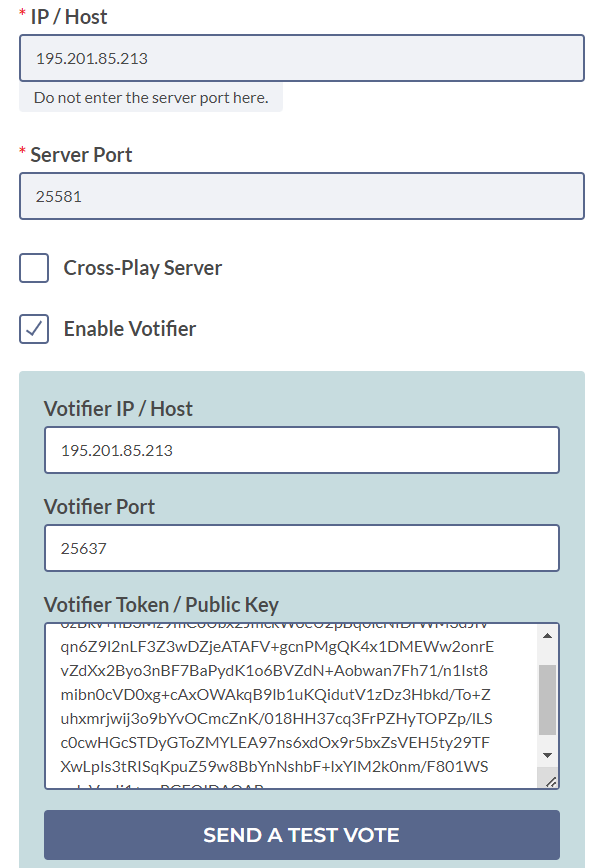
Now you setup the voting sites. they will ask for an IP, Port allocated for votifier (check step 6), the token (in the config.yml) and/or the public key, in plugins/Votifier/rsa/public.key
7. VotingPlugin
Now you've finished Votifier's configuration, we start with VotingPlugin.
In it's folder you will find a lot of files, what we will touch in this tutorial are VoteSites.yml and create a valid reward (in the Rewards folder) for our server
VoteSites.yml:
in here what we what to modify is the EverySiteReward (at the bottom of the file).
To add vote sites, we'll do it the easy way. I will create a vote site for this now
By following this tutorial I was able to find my server's ip.
Now send a test vote to ensure you've done everything correctly
in your server logs it should look similiar to this:
Votifier Test Vote Logs
[12:23:27 INFO]: [Votifier] Got a protocol v2 vote record from /66.175.210.190:46534 -> Vote (from:MinecraftServers.org username:MinecraftServers address:127.0.0.1 timeStamp:1704111807099 additionalData:null)
[12:23:27 INFO]: [VotingPlugin] Received a vote from service site 'MinecraftServers.org' by player 'MinecraftServers'!
[12:23:27 WARN]: [VotingPlugin] VoteSite with service site 'MinecraftServers.org' does not exist, attempting to generate...
[12:23:27 WARN]: [VotingPlugin] VoteSite MinecraftServers_org does not exist with the servicesite 'MinecraftServers.org', creating one, set AutoCreateVoteSites to false to prevent this
[12:23:27 WARN]: [VotingPlugin] VoteSites.MinecraftServers_org is not a configuration section
[12:23:27 INFO]: [VotingPlugin] Current known service sites: MinecraftServers.org
[12:23:27 WARN]: [VotingPlugin] Player MinecraftServers has not joined before, disregarding vote, set AllowUnjoined to true to prevent this
[12:23:31 INFO]: [VotingPlugin] VotingPlugin is up to date! Version: 6.15
The ports can be found in the network tab
Make sure your plugin is listening on the correct port, you can check in the console when restarting, look for this line: [INFO]: [Votifier] Votifier enabled on socket /[0:0:0:0:0:0:0:0%0]:25637. (My votifier port is 25637 as shown above, yours may be something else)
The primary port must be must be only used for your domain setup or joining the server and not be used by any other plugin which doesn't mention its need.
As you've sent the test vote, in your VoteSites.yml you'll find the voting website setup.
  MinecraftServers_org:
    Enabled: true
    ServiceSite: MinecraftServers.org
    VoteURL: VoteURL
    VoteDelay: 24.0
    DisplayItem:
      Material: GRASS
      Amount: 1
    Rewards:
      Messages:
        Player: '&aThanks for voting on %ServiceSite%!'
# Mine's this, let's break it down:
# Enabled: is a boolean variable, so only true or false, when it's true, if you run /vote, you'll see it in the VoteGUI, if disabled, it's not going to be in the GUI.
# ServiceSite: usually the domain of the voting site, don't modify it
# VoteURL: The URL where your players will vote for your server example: https://minecraftservers.org/server/randomServerID
# VoteDelay: if 24.0, it's going to be 24h, there is VoteDelayMin too if you want the delay to be based on minutes example: VoteDelayMin: 60 which means the next time you can vote is going to be in 60 minutes
# DisplayItem.Material: the item to show in the gui for the vote site
# DisplayItem.Amount: how many Material(s) to show in the vote gui
#Rewards: just ignore that, if you don't know how to setup the plugin, I will show how to give rewards in the next step through EverySiteReward in the bottom of the file.
Set EverySiteReward to the name of the rewards file you will make now:
Rewards (folder):
in plugins/VotingPlugin/Rewards
ExampleBasic.yml
# This is a reward file
# Define rewards in here (Items, commands, etc)
# File name is the reward name, without file extention
# This reward is named "ExampleBasic"
# That is what you put as a reward for other plugins, like VotingPlugin
# DO NOT HAVE DUPLICATE NAMES!!

# Wiki Page:
# https://github.com/BenCodez/AdvancedCore/wiki/Reward-files

# This is basic reward file
# You can have multiple reward files that contain all kinds of rewards
# Below are some basic things you can have, see the advanced example for more

# You can just remove values you don't want (just delete it)
# If you just want money just have a reward file containg only "Money: 100", for example
# You can simply copy and paste from here what you want
# in other reward files, that is the way they are designed

# If true:
# Only allow one item with chance to go through (from items below)
# If no chance specificied it will only give the first item
OnlyOneItemChance: false

# Items to give to user
Items:
  # Item
  # This is not item display name
  # No duplicate names
  Diamond:
    # Item Material
    # https://hub.spigotmc.org/javadocs/spigot/org/bukkit/Material.html
    Material: 'DIAMOND'
    # Item data value (Eg 1:4, data is 4)
    Data: 0
    # Will only give Amount if min and max amounts are 0
    Amount: 1
    # Set item durability
    # Set to 0 or remove line for no durability
    #Durability: 100

    # Random amount of items between Min and Max will be given
    # if min and max are not both 0

    # Min amount of items
    #MinAmount: 1

    # Max amount of items
    #MaxAmount: 4

    # Chance for this specific item to be given
    #Chance: 30

    # Item name
    # Remove this value to have no name
    Name: '&aSpecial Diamond'

    # Lore
    # Remove this value to have no lore
    Lore:
    - 'Line 1'

    # Enchants
    # use vanilla names
    Enchants:
      unbreaking: 1

    # Set glowing effect on item (enchanted item effect)
    Glow: false

    # Skull options
    #Skull: 'PLAYERNAME'
    # One place to find skull textures is here: https://minecraft-heads.com/
    #SkullTexture: 'SKULLTEXTURE'
    #SkullURL: 'URL to skull'

    # Hide enchants
    #ItemFlags:
    #- HIDE_ENCHANTS

    # CustomModelData nbt tag
    #CustomModelData: 100

    # Set power of firework
    #Power: 1

    # Whether or not to break lore into more than 1 line
    # Disable for certain custom items if needed
    #CheckLoreLenth: true
    #LoreLength: -1

    # Color of potion bottle
    # 0-255
    #PotionColor:
      #Red: 0
      #Green: 0
      #Blue: 0

    #Potions:
      #SPEED:
        #Duration: 20
        #Amplifier: 1

# Amount of money to give, requires vault
# Use 0 to give none
# Money is not per world
# Use negative to take money
# May need to use a command if it doesn't work
Money: 1000

# Pick random number between min and max money amount
#Money:
#  Min: 100
#  Max: 3000

#######
# Experience rewards
#######
# Give player experience (not levels)
#EXP: 100

# Pick a random number between min and max EXP amount to give
#EXP:
#  Min: 100
#  Max: 1000

EXPLevels: 3

# Random amount of EXP levels between 3 to 7
# EXPLevels:
  # Min: 3
  # Max: 7

# Commands to run
# Use %player% for player name
# Remove for no commands
Commands:
- say hi
#Commands:
  # Commands here will be run by console
#  Console:
#  - 'say %player% was lucky'
  # Commands here are run by player
#  Player:
#  - 'vote total'

# The messages are sent when rewards above are given to user
# set to '' to give no message (or just remove the option)
Messages:
  Player: '&aMessage on reward'
  Broadcast: '&aThis is a broadcast'

# Can also do this to message player
#Message: '&aMessage to player'
After setting up your rewards (you can check the above codeblock for some examples)
back in VotesSites.yml scroll to the very bottom and you'll find
EverySiteReward: {}remove the {} and set it to the name of your rewards file without the extension (.yml)
so:
EverySiteReward: ExampleBasicYou may want vault for permissions related and economy related

