
Export & Import your SQL Database
Step 1: Get Database Connection Details from Pterodactyl Panel
-
Log in to Pterodactyl Panel:
- Login into your account on the panel, if you haven't
-
Access the Server’s Database:
- Go to the server where the database is allocated at.
- Find and click on the "Databases" tab
inon theleft-sidenavigation menu.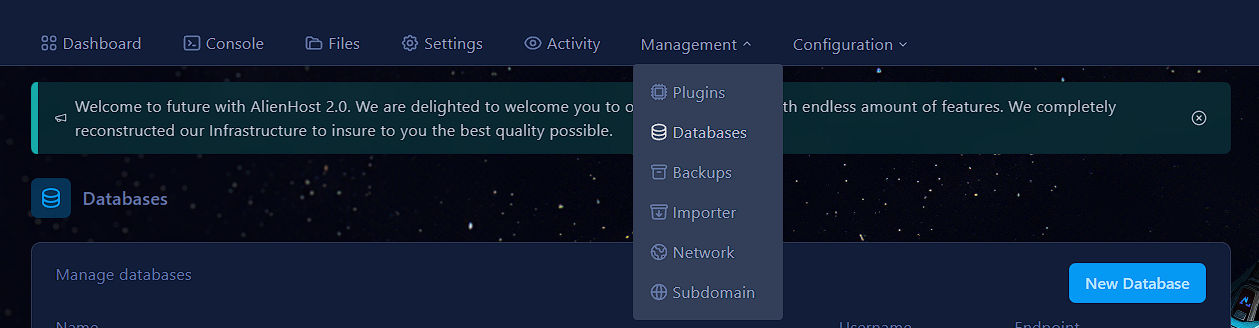

Here, to export/import a database file (.sql format), click on one of the 2 buttons.
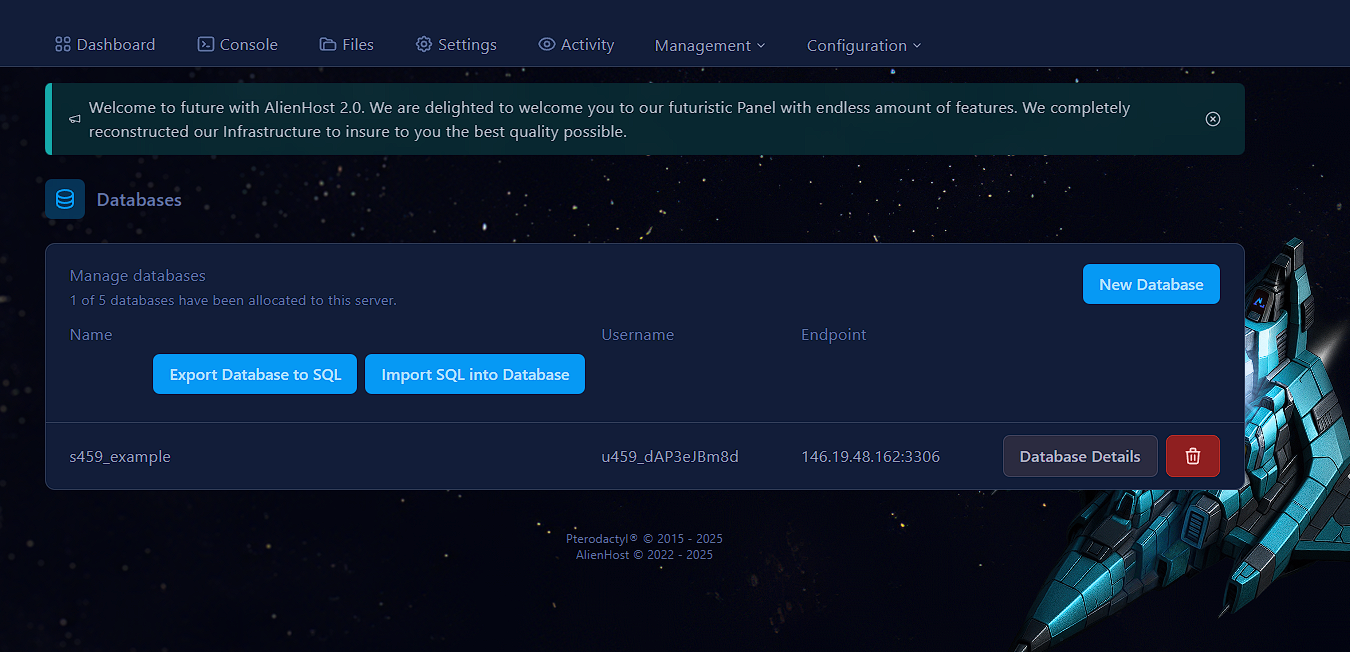
Exporting
Click on Export Database to SQL.
Now select a database to export (here it's s459_example)
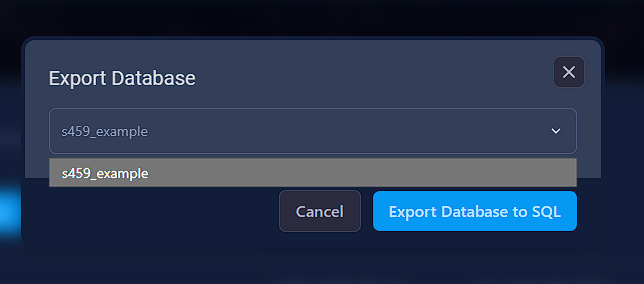
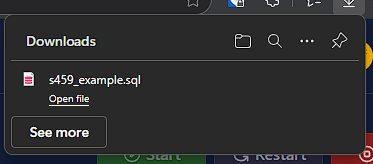
Now press Export Database to SQL on this pop-up, and it will automatically download for you.
Importing
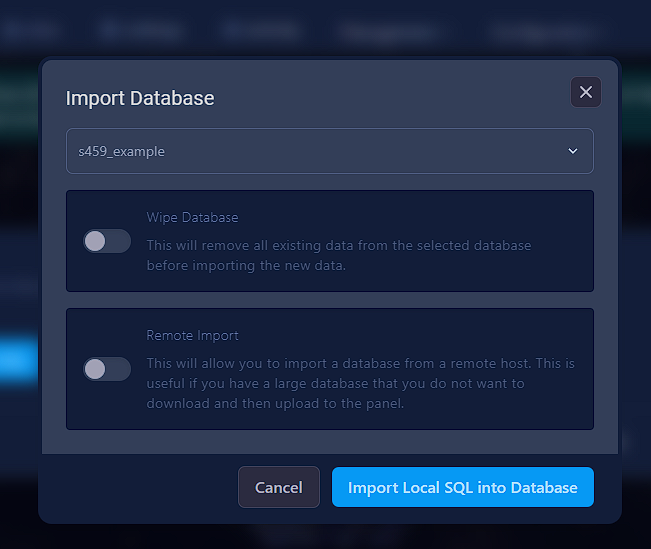
Click 3.on CopyImport SQL to Database
You will be prompted to the Connectionfollowing Information:
Here, you'll see details like(toggle thehost,optionsport,youdatabaseneed)name,
username,Click
andImportpasswordLocalforSQL into DatabaseIt will bring a new pop-up where you can find your
database..sql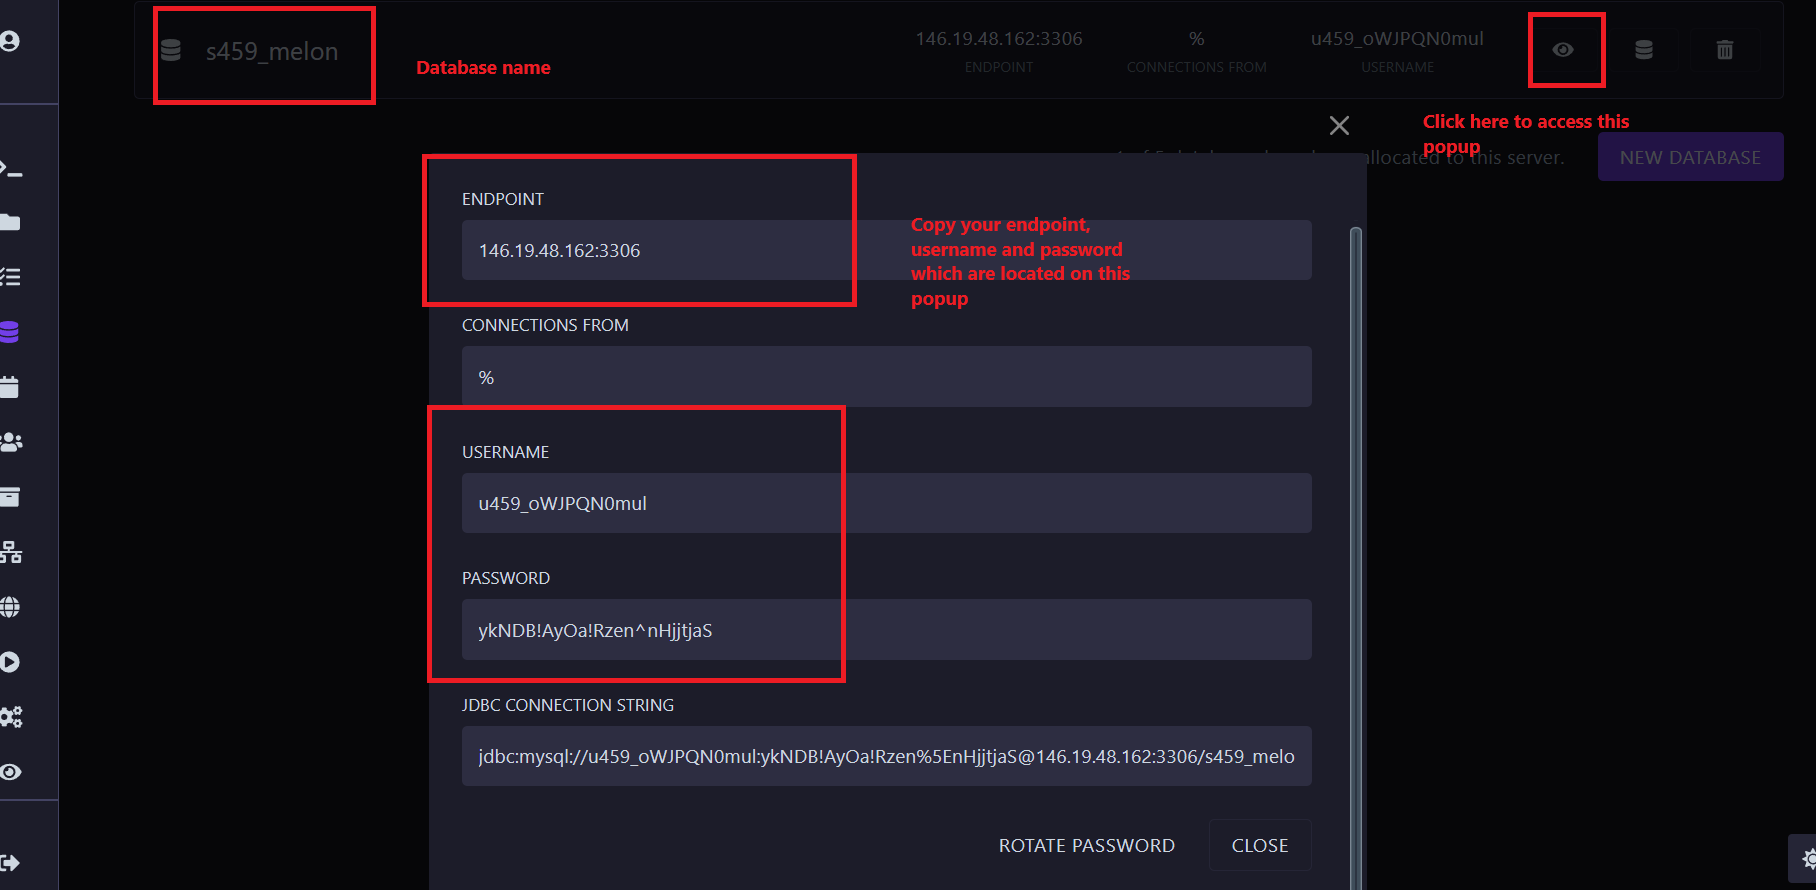
Copy these details, as you’ll need them to connect with HeidiSQL.

Step 2: Set Up HeidiSQL
Open HeidiSQL:Launch the HeidiSQL applicationfiles on your computer.
-
Createa New Session:ClickNewon the bottom-left side of the program.
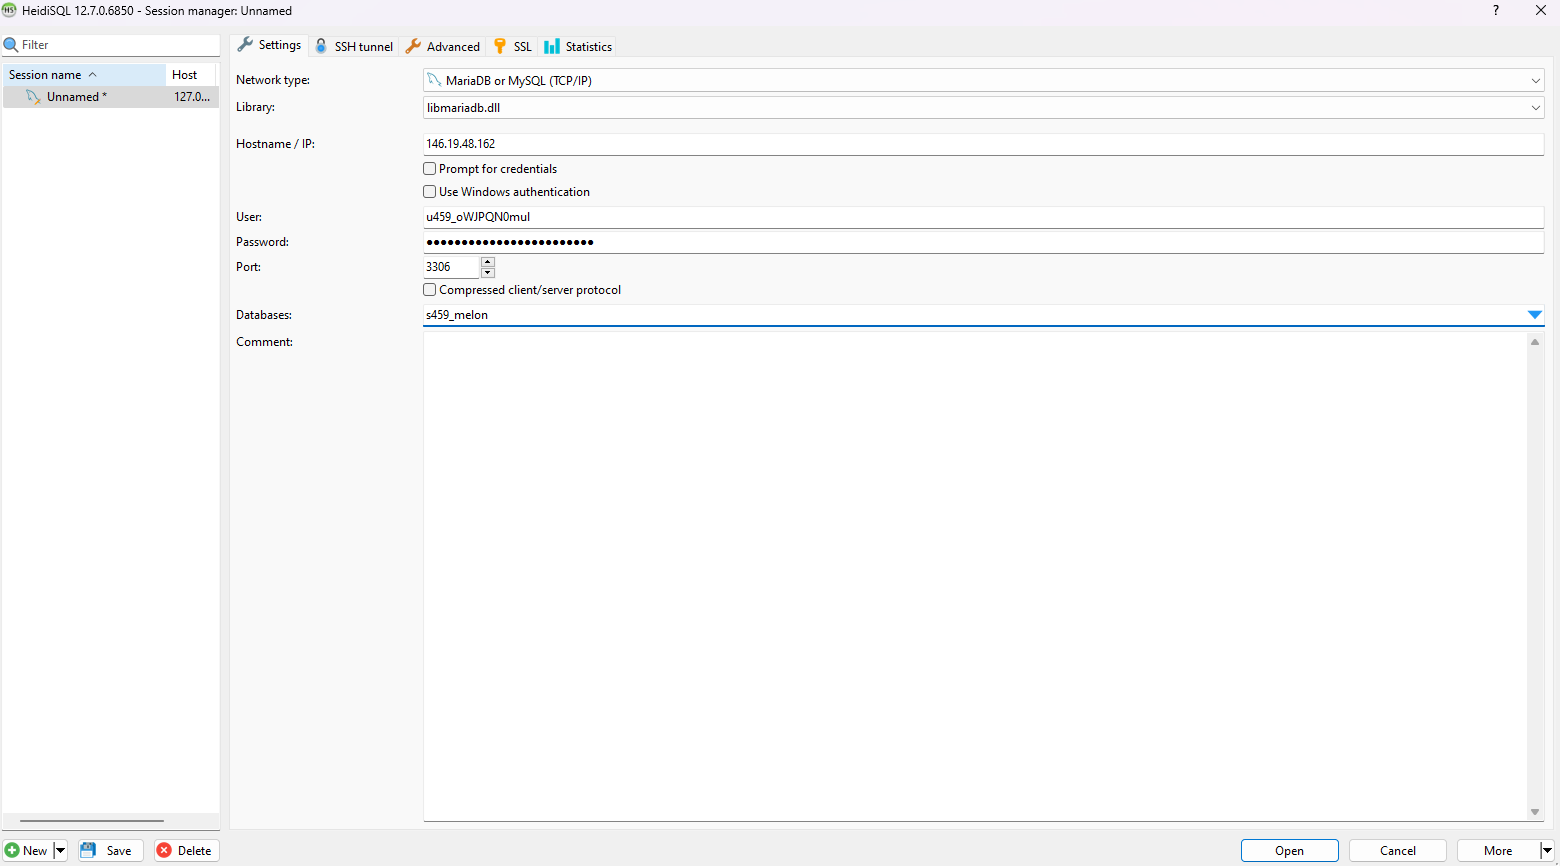
Enter Connection Details (obtained on step 2):UnderNetwork Type, select "MySQL (TCP/IP)."ForHostname/IP, paste thehostyou copied from the Pterodactyl panel.Enter theportnumber.Enter theusernameandpasswordfrom the Pterodactyl database details.ForDatabase, enter the database's name
It should look something like the image above
Save and Connect:Click onSave, thenOpento connect to the database.If your details are correct, HeidiSQL should connect to the database successfully.

Step 3: Export a Database in HeidiSQL
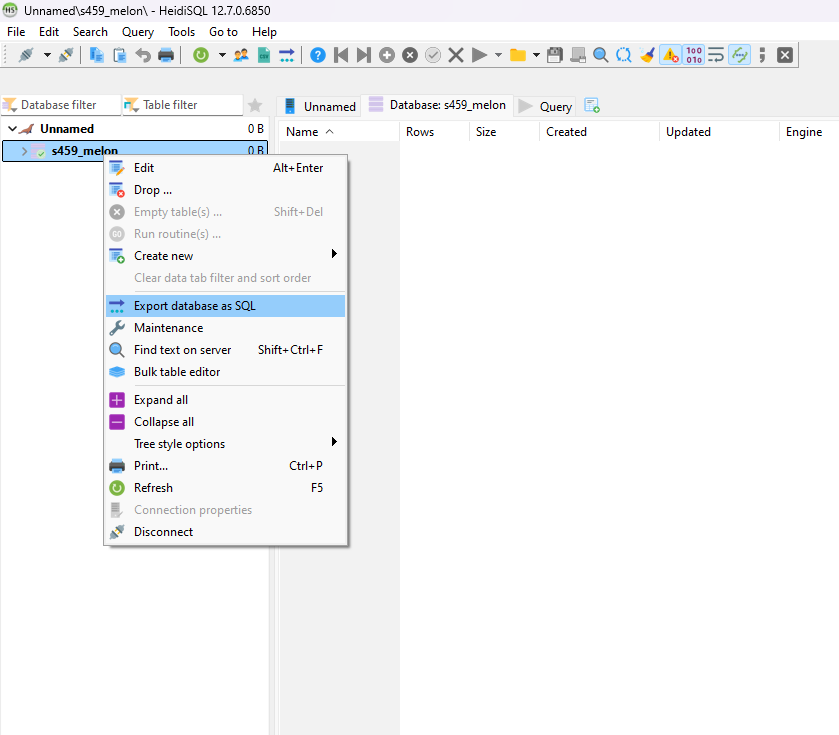
Select the Database:In HeidiSQL, select the database you want to export from the list on the left.
Export Database:Right-click on the database name, then go toExport Database as SQL.Choose where to save the SQL file and adjust any export settings you need (e.g., data, structure, etc.).ClickExportto save the SQL file to your selected location.
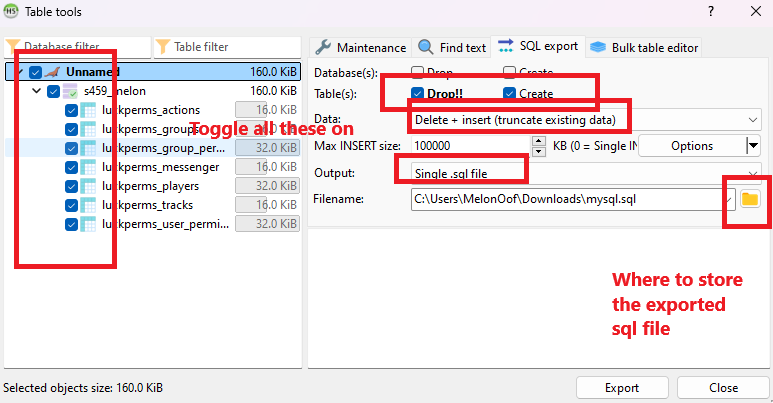
Check Exported File:Go to the saved location and check that the.sqlfile was created successfully.

Step 4: Import a Database in HeidiSQL
Select the Target Database:Make sure you are connected to the server and have selected the database you want to import data into. (Step 2, but with the database you want to import data into).
Open SQL File:Click on theFilemenu in HeidiSQL and selectLoad SQL file.Locate the.sqlfile you wish to import and open it.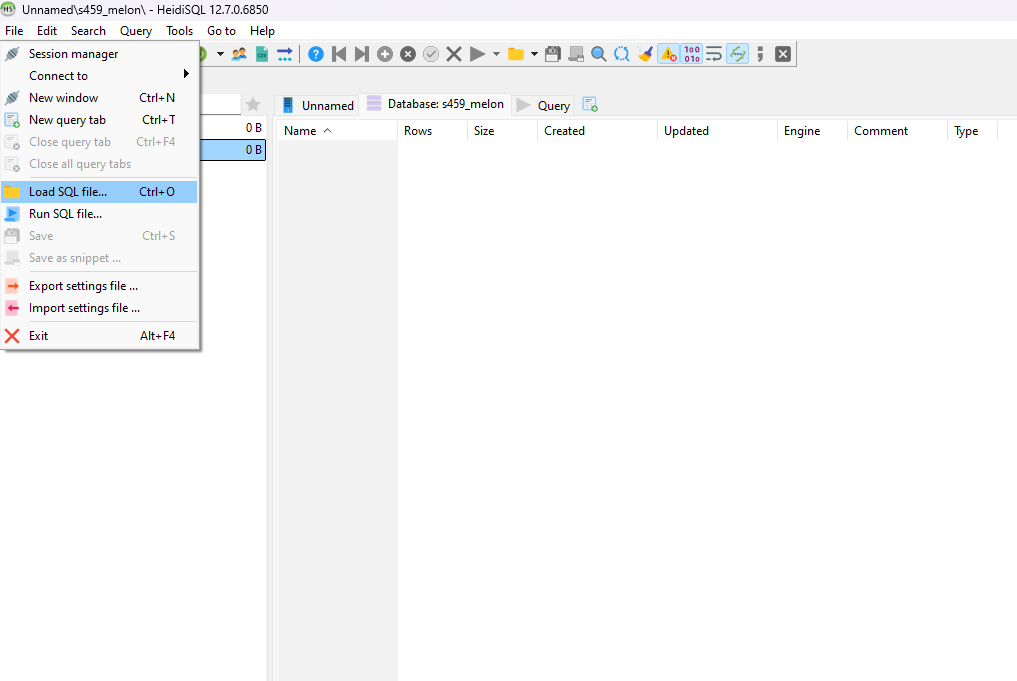
Execute Import:The SQL commands from the file will load in the SQL Query window. ClickRunto execute the commands, which will import the data and structure into the database.
Verify Import:Once the process completes, check the tables and data to ensure everything imported correctly.
